If you love desserts that feel special but require almost no effort, you’re in the right place. These Peanut Butter Oreo Ice Cream Sandwiches are sweet, salty, crunchy, and creamy—all in one bite. You only need a few grocery store staples and about 15 minutes of hands-on time.
No baking, no fancy tools, and no waiting around for complicated steps. Make a batch for a party, stash them in the freezer for surprise guests, or treat yourself on a hot afternoon.
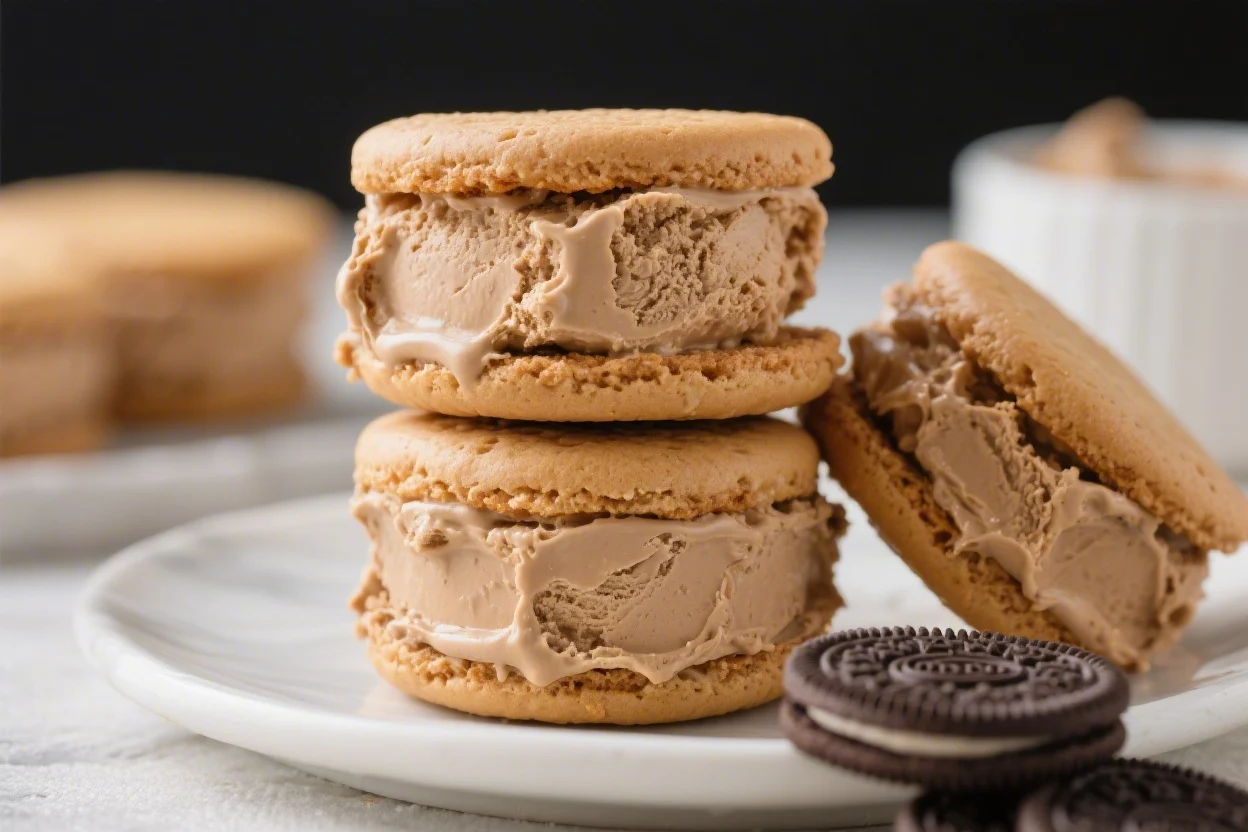
Peanut Butter Oreo Ice Cream Sandwiches The Easiest Frozen Treat Ever – A No-Fuss Crowd-Pleaser
Ingredients
Method
- Soften the ice cream: Set the ice cream out at room temperature for 10–15 minutes until it’s scoopable but not melting.
- Mix the peanut butter swirl: In a small bowl, stir peanut butter with vanilla extract and a pinch of salt. If the peanut butter is very thick, microwave it for 10–15 seconds to loosen.
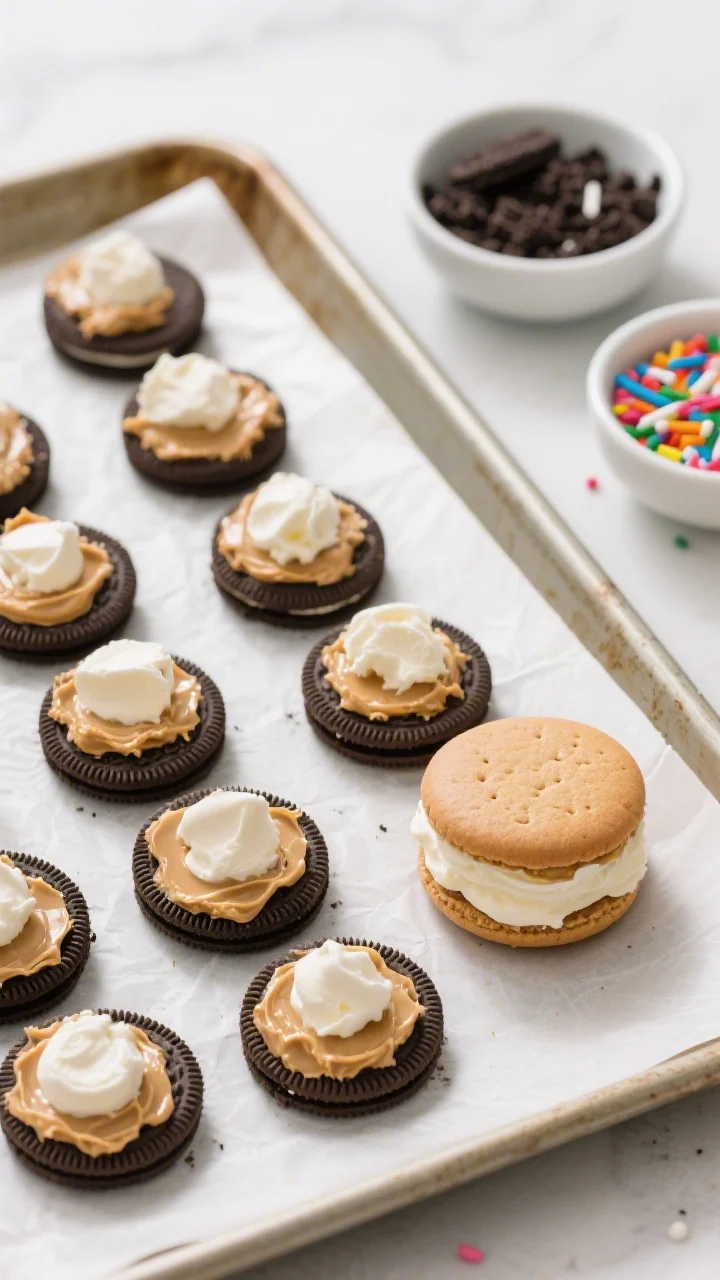
- Prepare your assembly line: Line a baking sheet with parchment paper. Place a layer of Oreos flat-side up on the sheet. Keep your toppings in small bowls nearby.
- Layer the filling: Add about 1 tablespoon of the peanut butter mixture onto each Oreo. Top with a rounded scoop of softened ice cream (about 2 tablespoons).
- Cap the sandwich: Press a second Oreo on top, twisting gently to spread the ice cream to the edges. Don’t press so hard that the cookies crack.
- Add coatings (optional): Roll the exposed ice cream edges in mini chips, nuts, or crumbs. Lightly press so they stick.
- Freeze to set: Place the sandwiches back on the parchment-lined sheet. Freeze for 1–2 hours, or until firm enough to handle and stack.
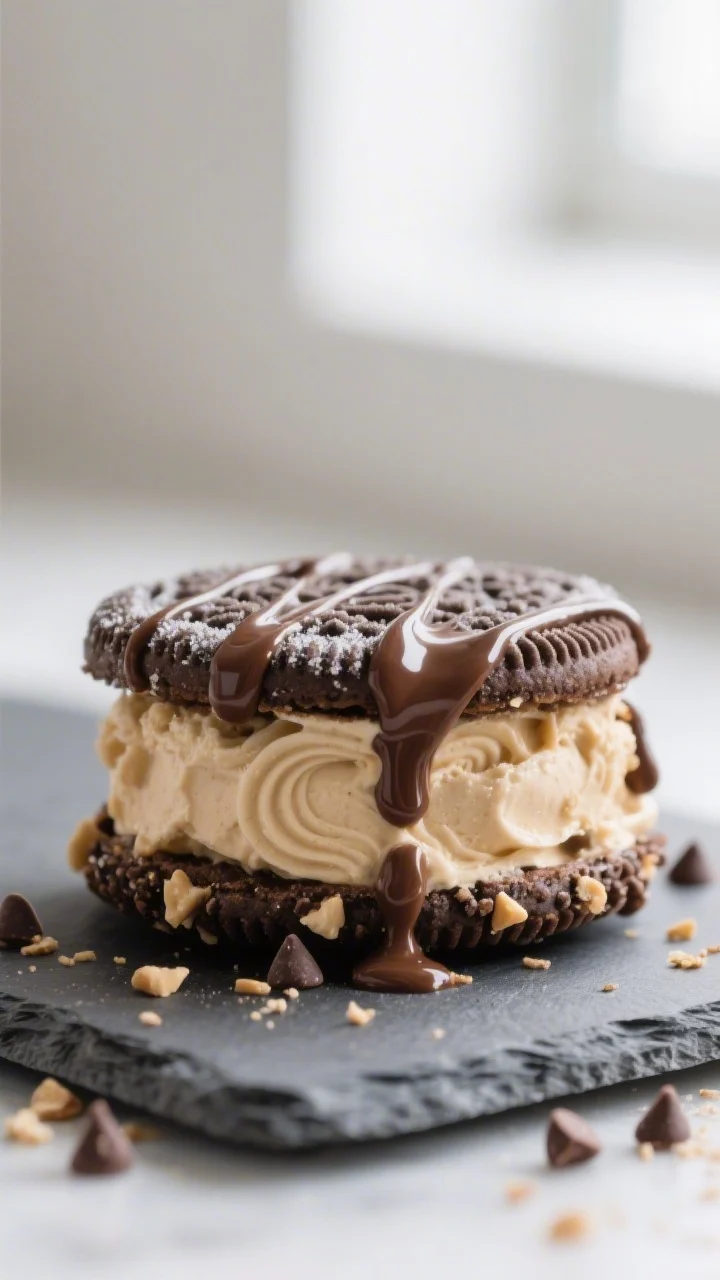
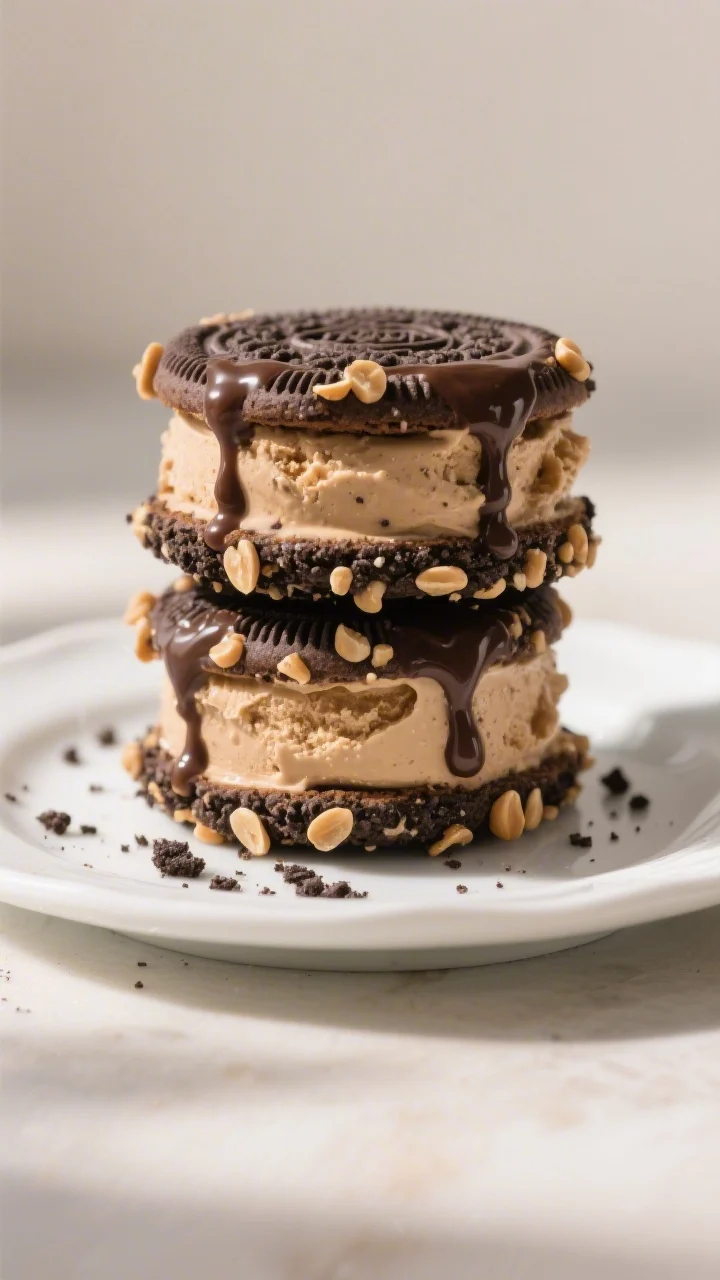
- Finish with a drizzle (optional): Once set, drizzle with melted chocolate or warm peanut butter. Freeze again 10 minutes to harden.
- Serve or store: Enjoy right away, or wrap individually and keep in the freezer for later.
Why This Recipe Works
- Minimal ingredients, maximum flavor: Peanut butter, Oreos, and vanilla ice cream create the perfect combo of sweet and salty with a familiar cookies-and-cream vibe.
- No-bake and foolproof: There’s no oven, no churning, and no delicate timing. Just assemble and freeze.
- Great texture: Soft, creamy ice cream nestled between crisp cookies that soften slightly as they set—dreamy and satisfying.
- Customizable: Roll the edges in mini chocolate chips, crushed peanuts, or more Oreo crumbs for a finishing touch that looks bakery-worthy.
- Make-ahead friendly: They hold perfectly in the freezer, so you can prepare days in advance.
Ingredients
- 1 package Oreo cookies (regular, Double Stuf, or your favorite flavor)
- 1.5 quarts vanilla ice cream (or chocolate, peanut butter, or cookies-and-cream)
- 1/2 cup creamy peanut butter (plus more if you like a stronger peanut butter flavor)
- 1 teaspoon vanilla extract (optional, for extra warmth)
- Pinch of salt (optional, boosts the sweet-salty balance)
- Optional coatings: mini chocolate chips, chopped peanuts, Oreo crumbs, rainbow sprinkles, mini peanut butter chips
- Optional drizzle: melted chocolate or warm peanut butter for finishing
Instructions
- Soften the ice cream: Set the ice cream out at room temperature for 10–15 minutes until it’s scoopable but not melting.
- Mix the peanut butter swirl: In a small bowl, stir peanut butter with vanilla extract and a pinch of salt.
If the peanut butter is very thick, microwave it for 10–15 seconds to loosen.
- Prepare your assembly line: Line a baking sheet with parchment paper. Place a layer of Oreos flat-side up on the sheet. Keep your toppings in small bowls nearby.
- Layer the filling: Add about 1 tablespoon of the peanut butter mixture onto each Oreo.
Top with a rounded scoop of softened ice cream (about 2 tablespoons).
- Cap the sandwich: Press a second Oreo on top, twisting gently to spread the ice cream to the edges. Don’t press so hard that the cookies crack.
- Add coatings (optional): Roll the exposed ice cream edges in mini chips, nuts, or crumbs. Lightly press so they stick.
- Freeze to set: Place the sandwiches back on the parchment-lined sheet.
Freeze for 1–2 hours, or until firm enough to handle and stack.
- Finish with a drizzle (optional): Once set, drizzle with melted chocolate or warm peanut butter. Freeze again 10 minutes to harden.
- Serve or store: Enjoy right away, or wrap individually and keep in the freezer for later.
Storage Instructions
- Short-term: Keep sandwiches on a parchment-lined sheet, covered, for up to 24 hours for easy party service.
- Long-term: Wrap each sandwich tightly in plastic wrap or parchment, then place in a freezer bag or airtight container. Freeze up to 2 months.
- Prevent freezer burn: Squeeze out excess air from bags and use a container to reduce jostling and ice crystal buildup.
- Serving from frozen: Let sit at room temperature 3–5 minutes to soften slightly before biting.
Benefits of This Recipe
- Fast and stress-free: Minimal prep, no stove or oven, and easy cleanup.
- Kid-friendly assembly: Simple steps kids can help with—scooping, capping, and rolling in toppings.
- Budget-friendly: Uses everyday ingredients and stretches into a big batch.
- Works for any occasion: Backyard BBQs, birthdays, game nights, or just a Tuesday treat.
- Endlessly flexible: Change the cookie, ice cream, or coatings to fit cravings or dietary needs.
Pitfalls to Watch Out For
- Over-softened ice cream: If it’s too melty, the sandwiches will slide and won’t set neatly.
Slightly soft is perfect.
- Cracked cookies: Press the top cookie gently and evenly. Twisting helps distribute pressure.
- Sticky peanut butter: If it’s too thick, it can pull the cookies apart. Loosen with a brief microwave zap or a spoon of cream or milk.
- Rushed freezing: Let them firm up fully before wrapping, or you’ll smear the edges and lose the shape.
- Moisture in the freezer: Keep them sealed tight to avoid ice crystals and soggy cookies.
Alternatives
- Different cookies: Try chocolate chip cookies, peanut butter cookies, or chocolate wafer cookies for a thinner bite.
- Ice cream flavors: Chocolate, peanut butter cup, coffee, strawberry, or caramel swirl are all great.
Dairy-free options (coconut, oat, or almond-based) work well too.
- Nut butter swaps: Almond butter, cashew butter, or sunflower seed butter for a nut-free option. Adjust salt to taste.
- Mix-ins: Fold crushed Oreos or peanut butter chips into the softened ice cream before assembling for extra texture.
- Healthier spins: Use light ice cream, frozen yogurt, or banana “nice cream.” Choose thin chocolate wafers to reduce richness, or roll in chopped peanuts instead of chocolate chips.
- Gluten-free: Use gluten-free sandwich cookies and confirm your ice cream is gluten-free.
- Mini sandwiches: Make bite-size versions with mini Oreos for parties and kids’ snacks.
FAQ
How far in advance can I make these?
You can assemble and freeze them up to 2 months ahead. For the best texture, enjoy within 2–3 weeks.
Wrap tightly and store in an airtight container to keep flavors fresh.
My cookies got too soft. What went wrong?
Likely too much moisture or long freezer time without proper wrapping. Next time, freeze on a sheet until solid, then wrap each sandwich and store in a sealed container to limit ice crystals.
Can I use crunchy peanut butter?
Yes.
Crunchy peanut butter adds texture and a pleasant bite. If it’s too thick to spread, warm it briefly or mix with a teaspoon of neutral oil or milk.
What if I don’t like vanilla ice cream?
Swap in whatever you love. Chocolate, coffee, or peanut butter swirl all pair well with Oreos and peanut butter.
Dairy-free ice creams hold up just as nicely.
How do I get clean edges on the sandwiches?
Use a small scoop for consistent portions. After pressing the cookies together, run an offset spatula or butter knife around the edges to smooth before rolling in coatings. A quick chill after coating also helps set the shape.
Can I make these without peanut butter?
Absolutely.
Skip the peanut butter and add a drizzle of chocolate or caramel instead. You can also use a chocolate-hazelnut spread for a different vibe.
What’s the best way to drizzle chocolate?
Melt chocolate chips with a touch of coconut oil or butter until smooth. Use a spoon or piping bag to zigzag over frozen sandwiches, then freeze 10 minutes to set.
Do I need to separate the Oreos first?
No.
Keep them whole and just sandwich the ice cream between two cookies. Twisting gently as you press helps spread the filling evenly without breaking the cookies.
Final Thoughts
Peanut Butter Oreo Ice Cream Sandwiches deliver that perfect mix of nostalgic flavor and modern ease. They’re fast to assemble, easy to customize, and always a hit.
Keep a batch in your freezer for instant dessert wins—you’ll thank yourself later. With a handful of pantry staples and a few minutes of prep, you’ve got the easiest frozen treat ever on standby. Enjoy every cold, crunchy, creamy bite.
Printable Recipe Card
Want just the essential recipe details without scrolling through the article? Get our printable recipe card with just the ingredients and instructions.