
There’s something incredibly comforting about a warm bowl of soup on a chilly day. For me, this recipe holds a special place in my heart. It’s the perfect blend of creamy, cheesy, and bursting with Tex-Mex flavors. Whether it’s fall or winter, this dish always hits the spot.
What I love most about this recipe is its versatility. You can use chicken breast, thighs, or even leftover chicken. The ingredients are simple and easy to find, making it accessible for anyone to try. Plus, it’s packed with essentials like enchilada sauce, beans, and corn for that extra depth of flavor.
In this article, I’ll walk you through both stovetop and slow cooker methods. Whether you’re a seasoned cook or just starting out, this step-by-step guide will help you create a delicious bowl of soup that’s sure to impress.
Key Takeaways
- Perfect for cozy fall and winter meals.
- Versatile recipe using different types of chicken.
- Simple ingredients make it easy to prepare.
- Creamy, cheesy, and packed with Tex-Mex flavors.
- Includes stovetop and slow cooker methods.
My Journey with Chicken Enchilada Soup
It all started with a craving for something warm and flavorful. I remember the first time I tried this dish—it was love at first bite. The combination of creamy cheese, rich sauce, and hearty ingredients made it an instant favorite. From that moment, I knew I had to make it my own.
Over time, I began experimenting with the recipe. Adjusting the spice level was one of the first changes I made. I wanted it to have just the right kick without being overwhelming. Then came the cheese. I tried everything from sharp cheddar to Monterey Jack, each adding its unique flavor. Finding the perfect balance was a fun challenge.
One of the trickiest parts was perfecting the sauce. I learned that cooking it for the right number of minutes makes all the difference. Too short, and it’s watery; too long, and it loses its vibrancy. Using precise measurements, like a cup of chicken broth or enchilada sauce, also ensured consistency every time.
Another tip I picked up was softening cream cheese before adding it to the mix. This step helps it blend seamlessly, creating that creamy texture we all love. Every minute spent tweaking the process was worth it. Now, this dish is a comforting staple in my home, and I’m excited to share it with you.
Gathering Ingredients and Essential Tools
The foundation of any great recipe lies in the quality of its ingredients. For this dish, fresh produce like onions, tomatoes, and chili peppers are key. They add depth and vibrancy to every bite. Here’s what you’ll need to get started:
- Fresh Produce: Onions, jalapeños, and garlic form the aromatic base. Choose firm, unblemished onions for the best flavor.
- Canned Goods: Diced tomatoes, black beans, and corn provide texture and richness. Opt for low-sodium versions if you’re watching your salt intake.
- Broth: Chicken or vegetable broth creates the liquid base. Homemade broth adds extra depth, but store-bought works just as well.
- Seasonings: Chili powder, cumin, and salt bring the dish to life. Adjust the spice level to your preference.
- Enchilada Sauce: Pre-made sauce saves time, but homemade versions allow for customization. Look for high-quality options with minimal additives.

When it comes to tools, having the right equipment makes the process smoother. A large soup pot is essential for stovetop cooking, while a slow cooker offers a hands-off approach. Don’t forget a sturdy spatula for stirring and a sharp knife for chopping. If you’re short on time, rotisserie chicken is a great shortcut—just shred it and add it to the mix.
Selecting quality ingredients is crucial. Fresh onions and well-seasoned salt can elevate the dish from good to great. If you’re experimenting, try swapping diced tomatoes for fire-roasted ones for a smoky twist. The beauty of this recipe lies in its flexibility, so don’t be afraid to make it your own.
Step-by-Step: How to Make My Chicken Enchilada Soup
Let’s dive into the process of creating a rich and comforting meal. Start by heating a tablespoon of olive oil in a large pot over medium heat. Add diced onions, chopped peppers, and minced garlic. Sauté until softened, about 3-4 minutes. This step builds the flavor base for your dish.
Next, pour in the enchilada sauce and diced tomatoes. Stir well to combine. Add black beans and corn for texture and richness. If you’re using a slow cooker, transfer everything to it now. Set it to low heat and let it simmer for 4-6 hours. For stovetop cooking, reduce the heat to low and let it simmer for 30 minutes.
Once the base is ready, it’s time to add the cream cheese. Make sure it’s softened to room temperature for easy blending. Stir it in gently until fully incorporated. This creates a creamy texture without lumps. Then, add shredded cheese in small batches, stirring constantly to melt it evenly.
Timing is crucial here. If you’re cooking meat, ensure it’s tender and juicy by checking it after the recommended cooking time. Once done, remove it from the pot and shred it using two forks. Return the shredded meat to the pot and stir gently to combine.
Here’s a pro-tip: Always add dairy ingredients slowly and stir gently to avoid splitting. This keeps the texture smooth and velvety. Follow these steps, and you’ll have a dish that’s bursting with flavor and warmth.
Mastering Variations: Chicken Enchilada Soup
Exploring new twists on a classic dish can make it even more exciting. One of my favorite ways to elevate this recipe is by adding extra cream. It creates a richer, silkier texture that’s hard to resist. If you’re feeling adventurous, try swapping the cheese for a spicy variety like pepper jack or a mild option like mozzarella.
Seasoning is another area where you can get creative. A teaspoon of chili powder adds a warm, smoky flavor, while a pinch of cayenne brings a subtle heat. Adjust these spices to suit your taste. For a sweeter touch, I love adding extra corn. It not only enhances the flavor but also adds a delightful crunch.

Using a slow cooker can transform the dish. It allows the flavors to meld together slowly, resulting in a deeper, more complex taste. If you’re short on time, the stovetop method works just as well. Both techniques are fantastic, so choose what fits your schedule.
Substituting ingredients is another way to make this recipe your own. Leftover or rotisserie meat is a great time-saver. Just shred it and add it to the mix. The key is to maintain a balance of flavors, so don’t be afraid to experiment. With these variations, you can enjoy a fresh take on a beloved classic every time.
Stovetop vs. Slow Cooker Methods
Choosing the right cooking method can make all the difference in flavor and texture. Both stovetop and slow cooker techniques have their unique benefits, and understanding these can help you decide which one suits your needs best.
The stovetop method is perfect for those short on time. It typically takes about 30 minutes, making it a quick option for busy days. The heat is direct, allowing you to control the consistency of the dish more precisely. However, the shorter cooking time means flavors may not meld as deeply as they do in a slow cooker.
On the other hand, the slow cooker method requires several hours, usually between 4-6, but the results are worth the wait. The low, steady heat allows ingredients to break down slowly, enhancing the overall taste. This method is ideal for achieving tender meat and a rich, well-balanced flavor.
When it comes to texture, the slow cooker excels. The extended cooking time helps retain the fat in the dish, giving it a creamier consistency. In contrast, the stovetop method can sometimes result in a thinner texture if not monitored closely.
Certain ingredients benefit more from one method over the other. For example, beans and corn absorb flavors better in a slow cooker, while fresh vegetables retain their crunch better on the stovetop. Balancing ingredient proportions is key, regardless of the method you choose.
To serve, ladle the dish into a bowl and garnish with crushed tortilla chips for added crunch. Both methods deliver a satisfying meal, but the slow cooker often wins in terms of depth of flavor and tenderness. Experiment with both to find your favorite!
Tips for Enhancing Flavor and Customizing Your Soup
Making small tweaks can transform a good dish into something extraordinary. Here are some practical tips to elevate the flavor and personalize your recipe based on your preferences or dietary needs.
Start by garnishing with crushed tortilla chips for added crunch. This simple touch not only enhances texture but also brings a fun, restaurant-style vibe to your bowl. It’s a quick way to make your meal feel special.
For extra protein, focus on preparing chicken breast perfectly. Cook it just until tender to avoid drying it out. Shred it using two forks for even pieces, then mix it in gently to maintain its juiciness.
Adjusting sodium levels is easy without sacrificing taste. Use low-sodium broth and skip added salt. Instead, rely on herbs and spices like cumin or chili powder to boost flavor naturally.
- Experiment daily with small changes. Swap ingredients like beans or corn for variety.
- Add a dollop of sour cream or avocado slices for creaminess.
- Try using chipotle peppers for a smoky twist.
Customization is key. Whether you’re adding extra protein or reducing sodium, these tips ensure your dish stays delicious and tailored to your taste. Every day is a chance to make it your own!
Final Reflections and Serving Suggestions
Creating this dish has been a journey of discovery and flavor. Every step, from choosing fresh ingredients to perfecting the balance of spices, has made it a cherished recipe in my kitchen. I hope it brings the same warmth and joy to your table.
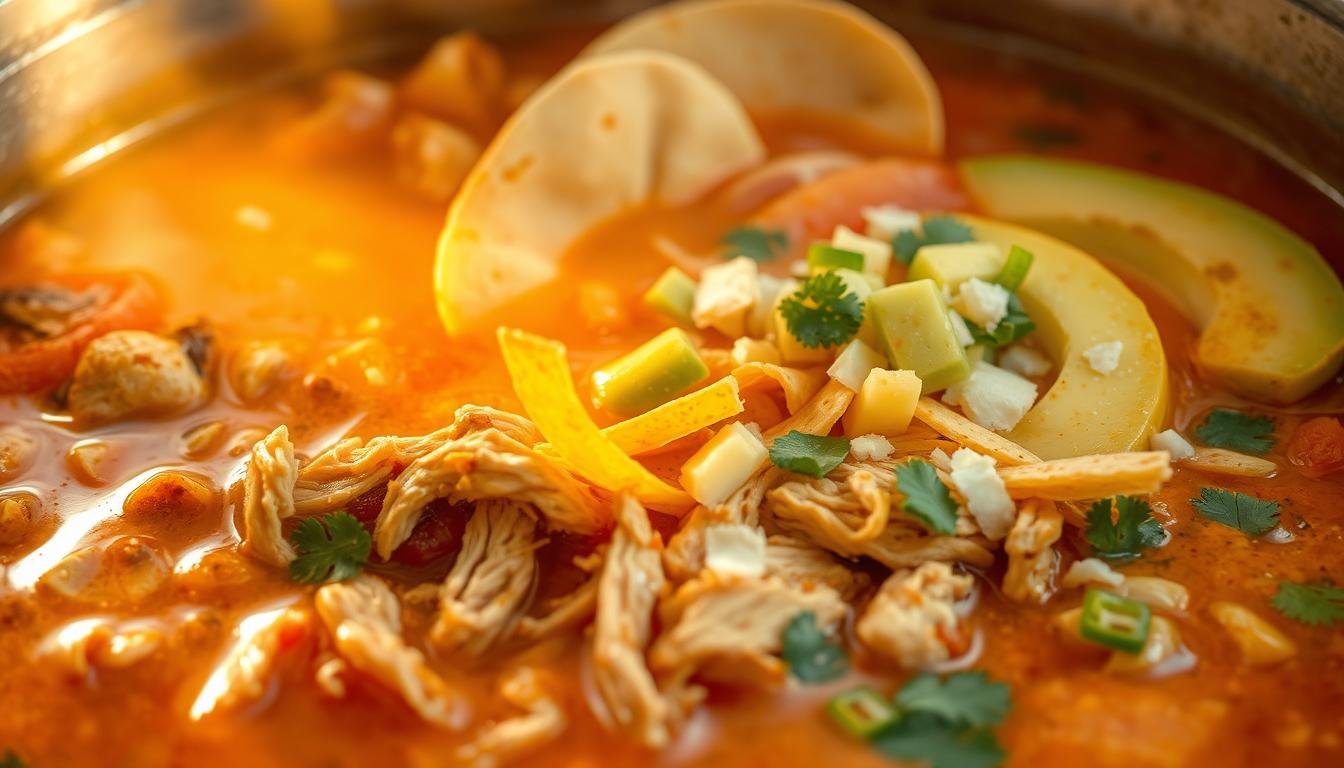
When serving, top each bowl with a sprinkle of shredded cheese and a handful of black beans for added texture. Pair it with a side of warm cornbread or a light taco salad to complete the meal. These combinations enhance the experience and make it feel like a celebration.
For leftovers, store them in an airtight container in the fridge for up to three days or freeze for future meals. A quality pot and careful stirring ensure every serving is as delicious as the first. Don’t forget to share your variations on social media—I’d love to see how you make it your own!
Enjoy every bite and celebrate the flavors you’ve created. This dish is more than a meal; it’s a reminder of the joy of cooking and sharing with loved ones.
FAQ
Can I make this dish ahead of time?
Absolutely! I often prepare it a day in advance. Just store it in the fridge and reheat when ready to serve. The flavors meld even more overnight.
What’s the best way to shred the meat?
I use two forks to pull it apart while it’s still warm. It’s quick and easy, and the texture turns out perfect for the recipe.
Can I use a different protein instead?
Sure! I’ve tried it with turkey or even plant-based alternatives. Just adjust the cooking time to ensure it’s tender and fully cooked.
How can I make it spicier?
I love adding extra chili powder or a dash of hot sauce. If you’re feeling adventurous, toss in some diced jalapeños for an extra kick.
Is it freezer-friendly?
Yes! I freeze it in airtight containers for up to 3 months. Thaw in the fridge overnight and reheat on the stovetop or in the microwave.
Can I use a slow cooker for this recipe?
Definitely. I’ve made it in my slow cooker, and it’s just as delicious. Cook on low for 6-8 hours or high for 3-4 hours.
What toppings do you recommend?
I love adding shredded cheese, a dollop of sour cream, and some crushed tortilla chips. Avocado slices or fresh cilantro also work beautifully.
How do I thicken the broth if it’s too thin?
I mix a tablespoon of cornstarch with water and stir it in while heating. It thickens up nicely without altering the flavor.
Can I make it vegetarian?
Of course! Swap the broth for vegetable broth and use beans or tofu instead of meat. It’s just as hearty and satisfying.
What’s the best way to store leftovers?
I keep them in an airtight container in the fridge for up to 3 days. Reheat gently on the stovetop or in the microwave.