
Finding lunchbox ideas that kids will actually eat can be a real challenge, especially when every day feels like a trade-off. To help you out, here are 15 easy lunchbox ideas that are not just simple to make but also delicious enough to keep your little ones from swapping their meals with friends. Say goodbye to lunchtime negotiations and hello to happy faces!
Cheese and Crackers with Grapes
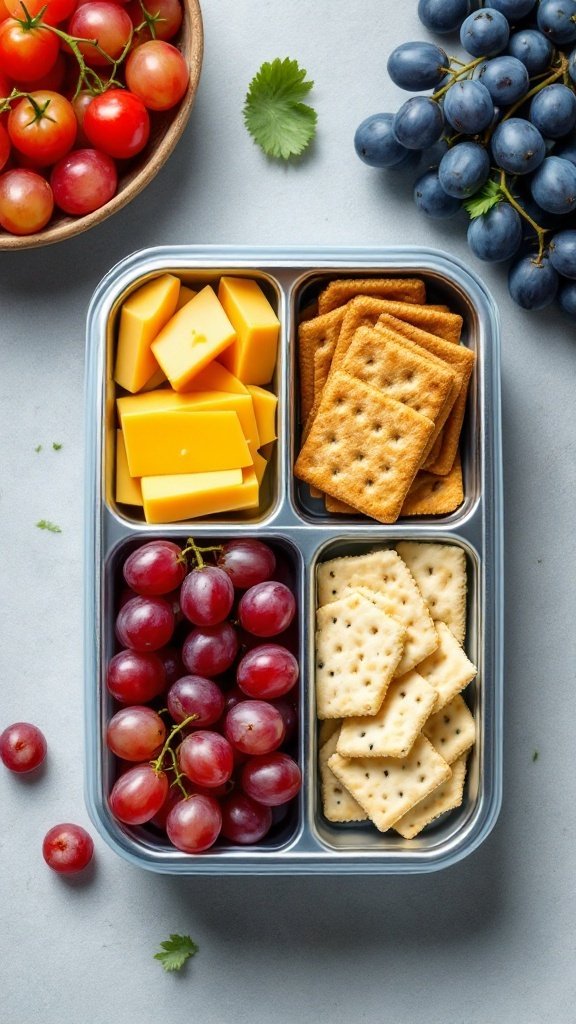
This simple lunchbox idea combines creamy cheese, crunchy crackers, and sweet grapes, creating a delightful balance of flavors and textures. It’s not only easy to prepare but also a hit among kids, making it less likely for them to trade it away during lunch!
The combination of savory cheese and crispy crackers pairs perfectly with the juicy sweetness of grapes, offering a nutritious and satisfying snack. Plus, it’s customizable—choose your favorite cheese and crackers for a personal touch!
Ingredients
- 1 cup of cheese (cheddar, gouda, or your choice), cut into cubes or slices
- 1 cup of whole-grain crackers
- 1 cup of grapes (red, green, or a mix)
- Optional: sliced cucumbers or cherry tomatoes for extra crunch
Instructions
- Prepare the ingredients: Wash the grapes under running water and pat them dry.
- Cut the cheese into cubes or slices, depending on your preference.
- Pack the cheese, crackers, and grapes into a lunchbox or container, separating them if needed to keep the flavors intact.
- Add in any optional veggies like cucumbers or cherry tomatoes for a colorful addition!
- Seal the lunchbox and it’s ready to go!
Whole Grain Turkey Wraps with Veggies
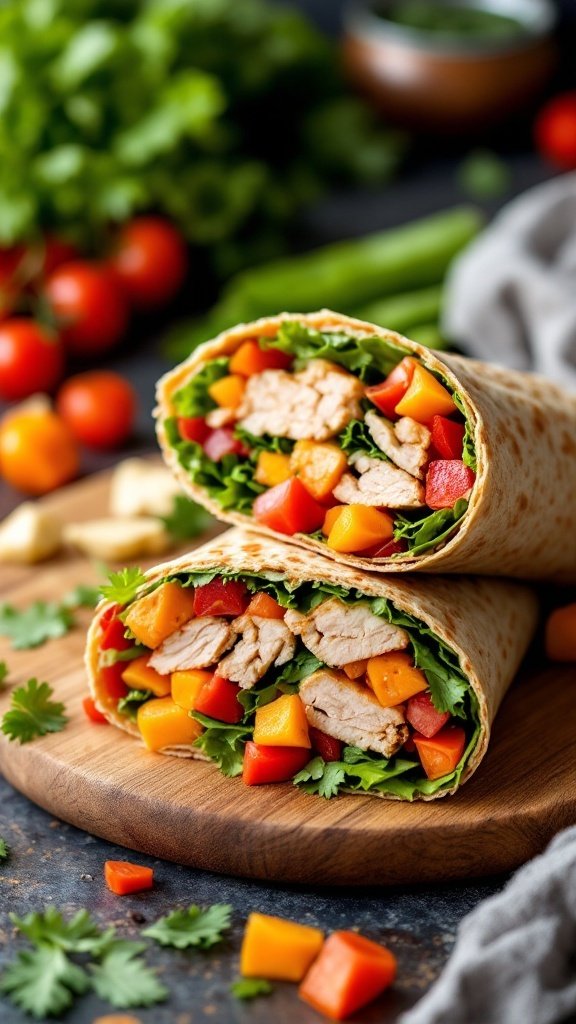
Whole Grain Turkey Wraps with Veggies are a delightful and nutritious option for lunchboxes. They blend the savory taste of turkey with a rainbow of fresh vegetables, all wrapped up in a wholesome whole grain tortilla. This recipe is not only simple to make, but it’s also packed with flavor, making it a hit among kids.
These wraps are versatile and can be customized with your child’s favorite veggies or spreads. With a fresh, crunchy texture and a satisfying bite, they’re sure to be a favorite that won’t be traded away during lunchtime!
Ingredients
- 4 whole grain tortillas
- 1 pound sliced turkey breast
- 1 cup spinach or lettuce
- 1 cup diced bell peppers (any color)
- 1 cup diced cucumbers
- 1/2 cup shredded carrots
- 1/4 cup hummus or cream cheese
- Salt and pepper to taste
Instructions
- Spread a thin layer of hummus or cream cheese over each tortilla.
- Layer the spinach or lettuce evenly on top of the spread.
- Add the sliced turkey, followed by the diced bell peppers, cucumbers, and shredded carrots.
- Season with salt and pepper to taste.
- Carefully roll the tortilla tightly from one end to the other, then slice in half to serve.
Fruit and Yogurt Parfaits
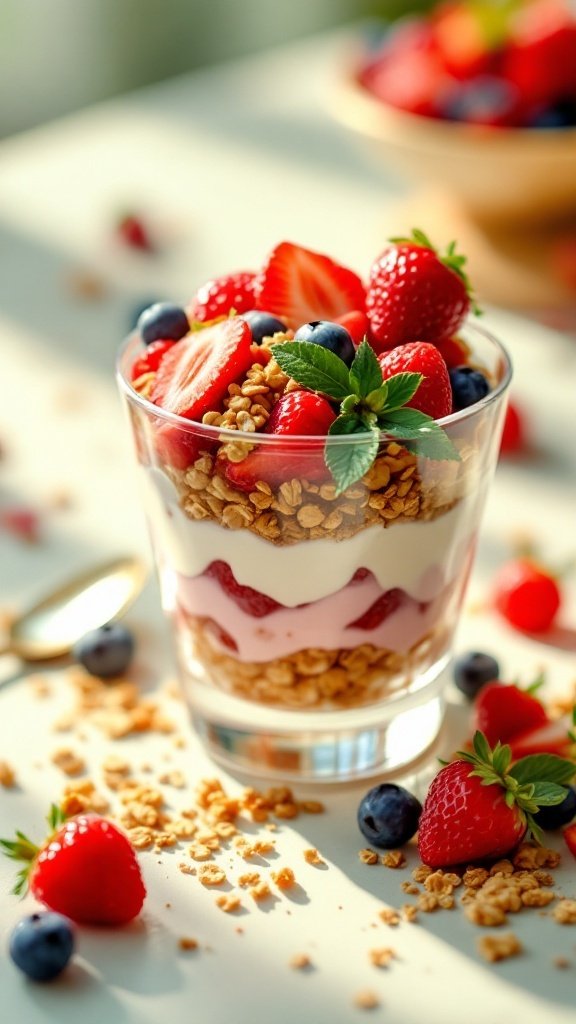
Fruit and yogurt parfaits are a delightful blend of fresh fruit, creamy yogurt, and crunchy granola. They are not only delicious but also super simple to put together. Kids love the vibrant colors and different textures, making this a fun and appealing lunchbox option.
This recipe is perfect for busy mornings since you can prep it in just a few minutes. Layering the ingredients in a clear cup or jar makes it visually appealing, and it’s a healthy choice that’s sure to satisfy. Plus, you can easily customize it with your child’s favorite fruits and flavors!
Ingredients
- 2 cups yogurt (any flavor)
- 1 cup granola
- 2 cups mixed berries (strawberries, blueberries, raspberries)
- 1 tablespoon honey or maple syrup (optional)
- Fresh mint leaves for garnish (optional)
Instructions
- Prepare the Ingredients: Wash and slice the strawberries and gather the blueberries and raspberries.
- Layer the Parfait: In a cup or jar, add a layer of yogurt at the bottom. Follow with a layer of granola, then a layer of mixed berries.
- Repeat Layers: Continue layering with yogurt, granola, and berries until the cup is filled, finishing with a layer of berries on top.
- Add Sweetness: Drizzle honey or maple syrup on top if desired. Garnish with fresh mint leaves for a pop of color.
- Serve: Enjoy immediately or cover and store in the refrigerator until lunchtime.
Homemade Chicken Nuggets

Homemade chicken nuggets are a fantastic option for kids’ lunches. They are crispy on the outside and tender on the inside, making them a hit with even the pickiest eaters. Plus, you can easily customize the spices and breadcrumbs to suit your family’s taste.
This recipe is simple and quick, perfect for busy weekdays. You can prepare a big batch and freeze them for later, ensuring that your kids have a delicious meal ready whenever they need it!
Ingredients
- 1 pound boneless, skinless chicken breasts, cut into bite-sized pieces
- 1 cup breadcrumbs (plain or seasoned)
- 1/2 cup grated Parmesan cheese
- 1 teaspoon garlic powder
- 1 teaspoon onion powder
- 1/2 teaspoon paprika
- Salt and pepper to taste
- 2 large eggs, beaten
- Oil for frying
Instructions
- Prepare the Coating: In a bowl, mix breadcrumbs, Parmesan cheese, garlic powder, onion powder, paprika, salt, and pepper.
- Dredge the Chicken: Dip each chicken piece into the beaten eggs, then coat with the breadcrumb mixture, pressing gently to adhere.
- Heat the Oil: In a large skillet, heat oil over medium heat.
- Fry the Nuggets: Add the coated chicken pieces to the skillet in batches, cooking for about 4-5 minutes on each side until golden brown and cooked through.
- Drain and Serve: Remove the nuggets from the skillet and place them on a paper towel to drain any excess oil. Serve warm with dipping sauces.
DIY Pizza Kits
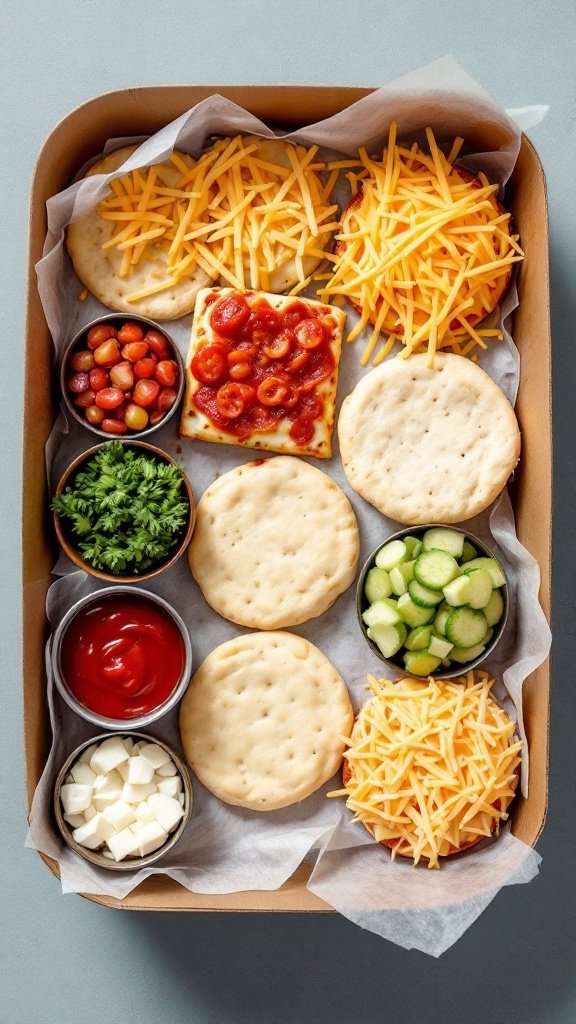
DIY Pizza Kits are a fun and interactive way to get kids involved in their meals. These kits allow children to create their own personal pizzas, choosing from a variety of toppings and sauces. With a base of soft dough, they can customize each pizza to suit their taste. The combination of flavors and textures makes every bite enjoyable, and the best part is that kids can personalize their pizzas however they like.
This recipe is simple to prepare, making it perfect for busy parents. Just gather the dough, sauce, and a selection of toppings such as cheese, veggies, and meats. Pack everything in a lunchbox, and your kids will have a tasty lunch they’re excited to eat. Here’s how to make your very own DIY Pizza Kits!
Ingredients
- 1 package of pre-made pizza dough
- 1 cup pizza sauce
- 2 cups shredded cheese (mozzarella, cheddar, or a blend)
- 1/2 cup sliced pepperoni or other meats
- 1 cup assorted vegetables (bell peppers, onions, cucumbers, etc.)
- 1/4 cup fresh herbs (basil, parsley, etc.)
Instructions
- Prepare the Dough: Roll out the pizza dough into small rounds, about 6 inches in diameter. You can use a cookie cutter or just shape them with your hands.
- Pack the Kits: Place the dough rounds in a lunchbox or container. Add small cups of pizza sauce, shredded cheese, and assorted toppings around the dough.
- Assemble: When ready to eat, kids can spread sauce on the dough, sprinkle cheese, and add their favorite toppings.
- Bake: Preheat the oven to 400°F (200°C). Place the assembled pizzas on a baking sheet and bake for 10-12 minutes, or until the dough is golden and the cheese is bubbly.
- Enjoy: Let cool for a few moments before enjoying these freshly made pizzas!
Cheesy Quinoa Bites with Spinach

Cheesy Quinoa Bites with Spinach are a tasty, nutritious option for lunchboxes that kids will happily munch on. These little bites are packed with flavor, featuring a delightful combination of cheese and spinach wrapped in a quinoa base. Not only are they delicious, but they’re also straightforward to make, making them a perfect choice for busy parents.
Ideal for kids who may be picky eaters, these bites can be enjoyed warm or cold, making them versatile for any lunch. Plus, they can be made ahead of time and stored in the fridge for easy grab-and-go meals throughout the week. Give them a try, and watch your kids enjoy a healthy option without trading it away!
Ingredients
- 1 cup quinoa, rinsed
- 2 cups vegetable broth
- 1 cup fresh spinach, chopped
- 1 cup shredded cheese (cheddar or mozzarella)
- 2 large eggs
- 1/2 cup breadcrumbs
- 1/4 teaspoon garlic powder
- Salt and pepper to taste
Instructions
- Cook the Quinoa: In a medium pot, bring the vegetable broth to a boil. Add the rinsed quinoa, reduce heat to low, cover, and simmer for about 15 minutes until the liquid is absorbed. Remove from heat and let it cool slightly.
- Mix Ingredients: In a large bowl, combine the cooked quinoa, chopped spinach, shredded cheese, eggs, breadcrumbs, garlic powder, salt, and pepper. Mix until everything is well combined.
- Form the Bites: Preheat your oven to 375°F (190°C). Grease a mini muffin tin. Scoop the quinoa mixture into the muffin tins, pressing down slightly to form little bites.
- Bake: Bake in the preheated oven for 20-25 minutes or until the tops are golden brown. Let cool slightly before removing from the tin.
- Serve: Enjoy warm or allow to cool completely before storing in an airtight container for lunchboxes.
Veggie Sushi Rolls

Veggie sushi rolls are a delightful way to introduce kids to a variety of vegetables in a fun and tasty format. With a mix of crunchy cucumbers, vibrant carrots, and creamy avocado, these rolls are not just colorful but also packed with flavor. Plus, they are simple to make, allowing for a stress-free lunch prep that kids will love.
Perfect for lunchboxes, these rolls can be enjoyed with a side of soy sauce or a sweet chili dip. The combination of fresh ingredients wrapped in rice and nori creates a satisfying bite that kids won’t want to trade. Let’s get rolling!
Ingredients
- 1 cup sushi rice
- 1 1/4 cups water
- 2 tablespoons rice vinegar
- 1 tablespoon sugar
- 1/2 teaspoon salt
- 4 sheets nori (seaweed)
- 1 small cucumber, julienned
- 1 carrot, julienned
- 1 avocado, sliced
- 1/2 bell pepper, thinly sliced
- Soy sauce or sweet chili sauce for dipping
Instructions
- Prepare the Rice: Rinse sushi rice under cold water until the water runs clear. Combine rice and water in a saucepan and bring to a boil. Once boiling, reduce heat, cover, and simmer for 15 minutes. Remove from heat and let sit for 10 minutes.
- Season the Rice: In a small bowl, mix rice vinegar, sugar, and salt until dissolved. Fluff the cooked rice with a fork and gently fold in the vinegar mixture until combined. Let it cool slightly.
- Assemble the Rolls: Lay a sheet of nori on a bamboo mat or clean surface, shiny side down. With wet hands, spread a thin layer of rice over the nori, leaving a 1-inch border at the top. Arrange a few pieces of cucumber, carrot, avocado, and bell pepper in a line across the rice.
- Roll It Up: Starting from the bottom, carefully roll the sushi away from you, pressing gently but firmly. Use the bamboo mat to help shape it. Seal the edge with a bit of water.
- Slice and Serve: Using a sharp knife, slice the roll into bite-sized pieces. Serve with soy sauce or sweet chili sauce for dipping.
Mini Pita Pockets with Hummus and Veggies
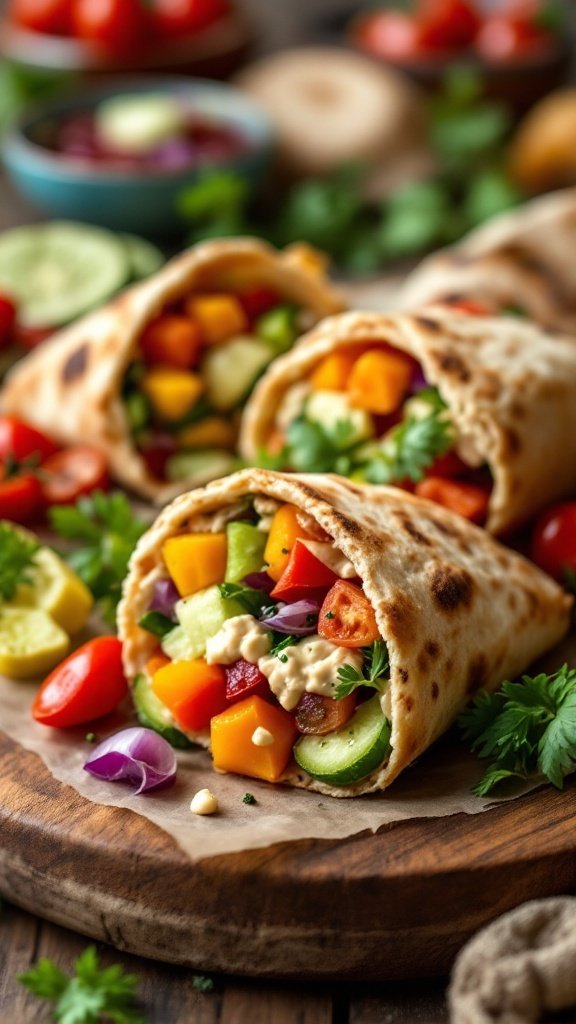
Mini pita pockets filled with hummus and fresh veggies offer a fun, tasty option for lunchboxes. Kids love the colorful mix of crunchy vegetables paired with the creamy, flavorful hummus, making this dish a hit. Plus, they’re super easy to whip up!
These pita pockets are not only delicious but also customizable. You can use any combination of veggies to suit your child’s taste, ensuring they get a healthy dose of nutrients while enjoying their meal. It’s a quick recipe that can be prepared in no time!
Ingredients
- 4 mini pitas
- 1 cup hummus (store-bought or homemade)
- 1/2 cup diced cucumbers
- 1/2 cup cherry tomatoes, halved
- 1/4 cup diced bell peppers (any color)
- 1/4 cup shredded carrots
- 1/4 cup chopped red onion
- Fresh cilantro or parsley, for garnish
Instructions
- Prepare the Pitas: Gently warm the mini pitas in a skillet for about 1 minute on each side to make them more pliable.
- Spread the Hummus: Once warm, cut each pita in half and spread about 2 tablespoons of hummus inside each pocket.
- Add the Veggies: Stuff the pitas with a mix of diced cucumbers, cherry tomatoes, bell peppers, shredded carrots, and red onion.
- Garnish: Top with fresh cilantro or parsley for added flavor.
- Pack for Lunch: Place the stuffed pitas in a lunchbox, and they’re ready to go! Serve with extra veggies or a small serving of fruit on the side.
Veggie and Cheese Skewers
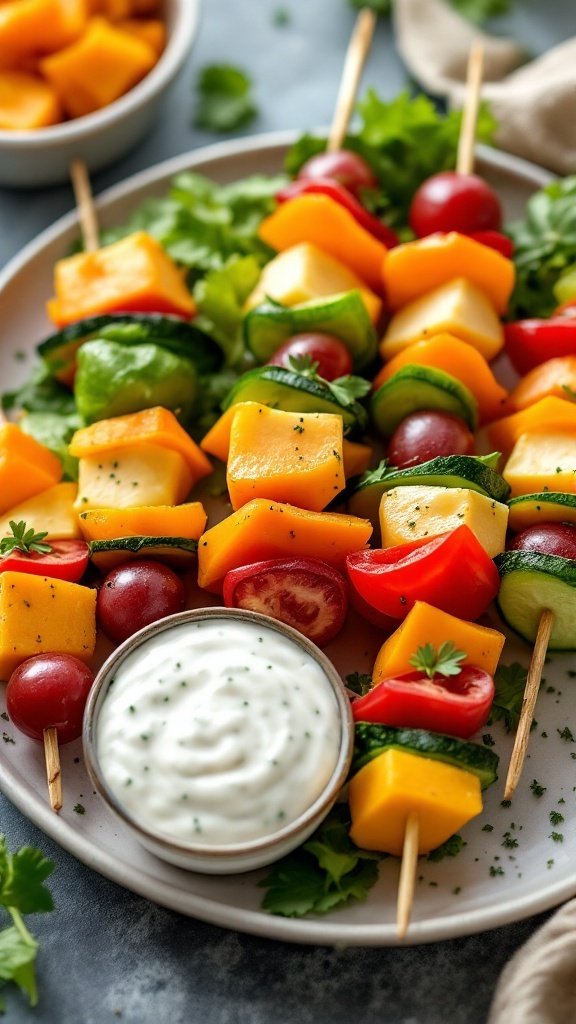
Veggie and cheese skewers are a fun and colorful way to pack a nutritious lunch that kids are sure to enjoy. These skewers combine fresh vegetables and flavorful cheese cubes, creating a tasty combination that’s both crunchy and creamy. Not only do they look appealing, but they are also simple to make, making them a perfect choice for busy parents.
These skewers are versatile too! You can mix and match your favorite veggies and cheeses, so your kids never tire of them. They taste fresh and satisfying, especially when paired with a tasty dip. Plus, the hands-on experience of eating with skewers makes lunch feel more like a treat.
Ingredients
- 1 cup cherry tomatoes
- 1 cup cucumber, sliced
- 1 cup bell pepper, diced
- 1 cup cheddar cheese, cubed
- 1 cup zucchini, sliced
- Fresh herbs (like parsley or basil) for garnish
- Your favorite dip (such as ranch or hummus)
- Skewers (wooden or reusable)
Instructions
- Prep the Veggies: Wash and slice the cucumbers, bell peppers, and zucchini into bite-sized pieces.
- Assemble the Skewers: On each skewer, alternate threading cherry tomatoes, cheese cubes, cucumber slices, bell pepper pieces, and zucchini rounds until the skewer is filled.
- Garnish: Sprinkle fresh herbs over the skewers for added flavor and color.
- Serve: Pack the skewers in a lunchbox with a small container of your favorite dip on the side.
Peanut Butter and Banana Sandwiches

Peanut butter and banana sandwiches are a delightful and simple option for lunchboxes that kids will love. With creamy peanut butter paired with sweet, soft bananas, this sandwich is not only tasty but also packed with nutrients. It’s quick to prepare, making it a hassle-free choice for busy parents.
This recipe allows for a bit of creativity as you can use different types of bread, from whole grain to fluffy white, and even cut the sandwiches into fun shapes. These sandwiches are sure to be a hit, keeping your kids satisfied and energized throughout the day!
Ingredients
- 2 slices of bread (whole grain or white)
- 2 tablespoons of peanut butter
- 1 banana, sliced
- Honey (optional, for drizzling)
- Cinnamon (optional, for sprinkling)
Instructions
- Spread peanut butter evenly on one side of each slice of bread.
- Layer the banana slices on one slice of bread over the peanut butter.
- If desired, drizzle a little honey or sprinkle some cinnamon on top of the bananas.
- Top with the second slice of bread, peanut butter side down, to make a sandwich.
- Cut into halves or fun shapes using cookie cutters, if desired, and pack into the lunchbox.
Cucumber and Cream Cheese Sandwiches
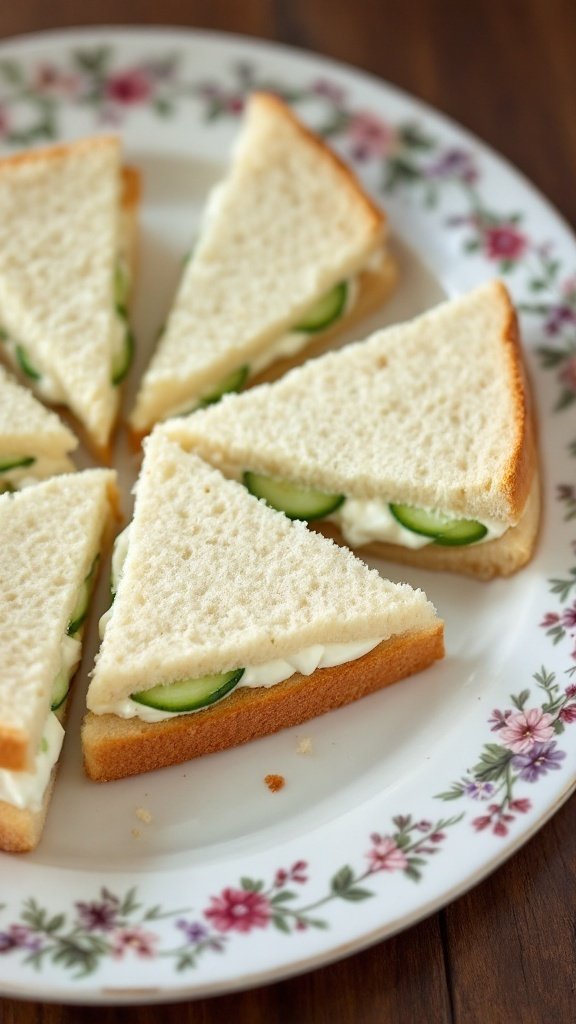
Cucumber and cream cheese sandwiches are a refreshing and delightful option for lunchboxes. They feature a creamy spread paired with crisp cucumber slices, all nestled between soft bread. The combination of flavors is light and satisfying, making them perfect for kids who may be hesitant to try new foods.
These sandwiches are incredibly easy to prepare, requiring minimal ingredients and time. With just a few simple steps, you can create a lunch that’s not only appealing but also nutritious. Plus, the bright green cucumbers add a fun pop of color that kids will love!
Ingredients
- 8 slices of soft white or whole wheat bread
- 4 ounces cream cheese, softened
- 1 medium cucumber, thinly sliced
- Salt and pepper to taste
Instructions
- Prepare the Spread: In a bowl, mix the softened cream cheese with a pinch of salt and pepper until smooth.
- Assemble the Sandwiches: Spread an even layer of the cream cheese mixture on one side of each slice of bread.
- Add the Cucumber: Place a layer of thin cucumber slices on top of the cream cheese on half of the slices. Top with another slice of bread, cream cheese side down.
- Cut and Serve: Cut the sandwiches into triangles or squares and serve immediately, or pack them in a lunchbox. Enjoy!
Savory Egg Muffins

Savory egg muffins are a delightful way to bring a burst of flavor and nutrition to your child’s lunchbox. These little bites are packed with eggs, vegetables, and cheese, creating a tasty treat that kids will love. They’re quick to whip up, making them a perfect option for busy mornings.
Not only do they taste great, but they are also versatile; you can customize them with your child’s favorite veggies and toppings. Plus, they are easy to store and reheat, ensuring your kids have a satisfying meal ready to go!
Ingredients
- 6 large eggs
- 1 cup milk
- 1 cup shredded cheese (cheddar or mozzarella)
- 1 cup chopped vegetables (spinach, bell peppers, or tomatoes)
- 1/2 teaspoon salt
- 1/4 teaspoon black pepper
- 1/2 teaspoon garlic powder
- 1/2 teaspoon onion powder
Instructions
- Preheat your oven to 350°F (175°C) and grease a muffin tin.
- In a large bowl, whisk together the eggs and milk until well combined.
- Add the cheese, chopped vegetables, salt, pepper, garlic powder, and onion powder to the egg mixture. Stir until everything is evenly distributed.
- Pour the mixture into the greased muffin tin, filling each cup about 3/4 full.
- Bake for 20-25 minutes, or until the muffins are set and lightly golden on top.
- Allow to cool slightly before removing from the tin. Enjoy warm, or store in an airtight container for later!
Sweet Potato and Black Bean Tacos
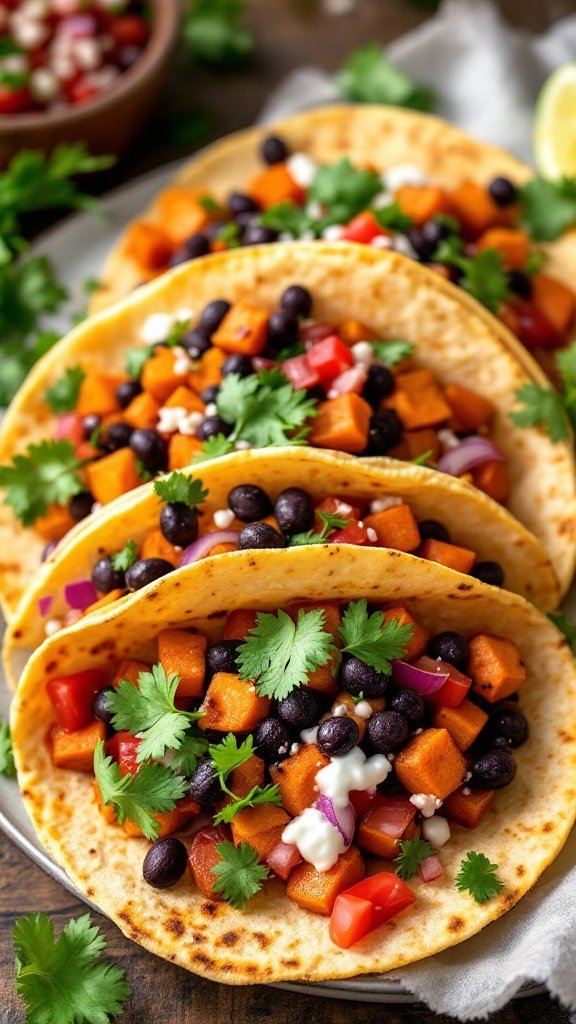
Sweet potato and black bean tacos are a delightful blend of flavors that kids love! The natural sweetness of the roasted sweet potatoes pairs perfectly with the hearty black beans, creating a satisfying meal that’s easy to prepare. Not only are these tacos tasty, but they also pack a nutritious punch, making them a great option for lunchboxes.
This recipe is quick to make, which is a bonus for busy parents. You can easily customize the toppings to suit your kids’ preferences, whether it’s adding some cheese, avocado, or a sprinkle of fresh cilantro. These tacos are sure to be a hit and are unlikely to be traded away!
Ingredients
- 2 medium sweet potatoes, peeled and diced
- 1 can black beans, drained and rinsed
- 1 tablespoon olive oil
- 1 teaspoon cumin
- 1 teaspoon smoked paprika
- Salt and pepper to taste
- 8 small corn tortillas
- Fresh cilantro, chopped (for garnish)
- Chopped tomatoes or salsa (optional)
- Avocado or sour cream (optional)
Instructions
- Preheat the oven to 400°F (200°C). Toss the diced sweet potatoes with olive oil, cumin, smoked paprika, salt, and pepper. Spread them evenly on a baking sheet.
- Roast the sweet potatoes for about 25 minutes or until they are tender and slightly caramelized, stirring halfway through.
- While the sweet potatoes are roasting, warm the black beans in a small saucepan over low heat.
- Once the sweet potatoes are ready, warm the corn tortillas in a skillet or microwave.
- Assemble the tacos by placing a scoop of black beans and roasted sweet potatoes in each tortilla. Top with chopped cilantro and any additional toppings as desired.
- Serve immediately or pack in lunchboxes for a tasty meal on the go!
Beef and Cheese Roll-Ups

Beef and cheese roll-ups are a fun and tasty option for lunchboxes that kids will love. These easy-to-make roll-ups combine savory beef slices with creamy cheese, offering a delightful mix of flavors and textures. They are not only satisfying but also quick to prepare, making them a perfect choice for busy parents.
The best part about these roll-ups is their versatility. You can customize them with different types of cheese or add some vegetables for extra crunch. Whether served alone or with a side of fruit, these roll-ups are sure to be a hit and won’t end up traded away at lunchtime!
Ingredients
- 8 slices of deli beef
- 4 slices of cheese (cheddar or Swiss work well)
- 1/4 cup of cream cheese
- 1/2 cup of sliced bell peppers (optional)
- Salt and pepper to taste
- Toothpicks for securing the rolls
Instructions
- Prepare the Ingredients: Start by laying out the deli beef slices on a clean surface. Spread a thin layer of cream cheese on each slice, ensuring it covers the surface evenly.
- Add Cheese and Veggies: Place a slice of cheese on top of each beef slice. If using, add a few slices of bell pepper for added crunch.
- Roll It Up: Carefully roll each beef and cheese slice tightly, starting from one end. Ensure the filling stays inside as you roll.
- Secure the Roll: Use toothpicks to hold the rolls together. Cut them in half for easier handling, if desired.
- Serve or Pack: These roll-ups can be enjoyed immediately or packed in a lunchbox. They’re perfect for on-the-go snacking!
Fruit Kabobs with Honey Drizzle
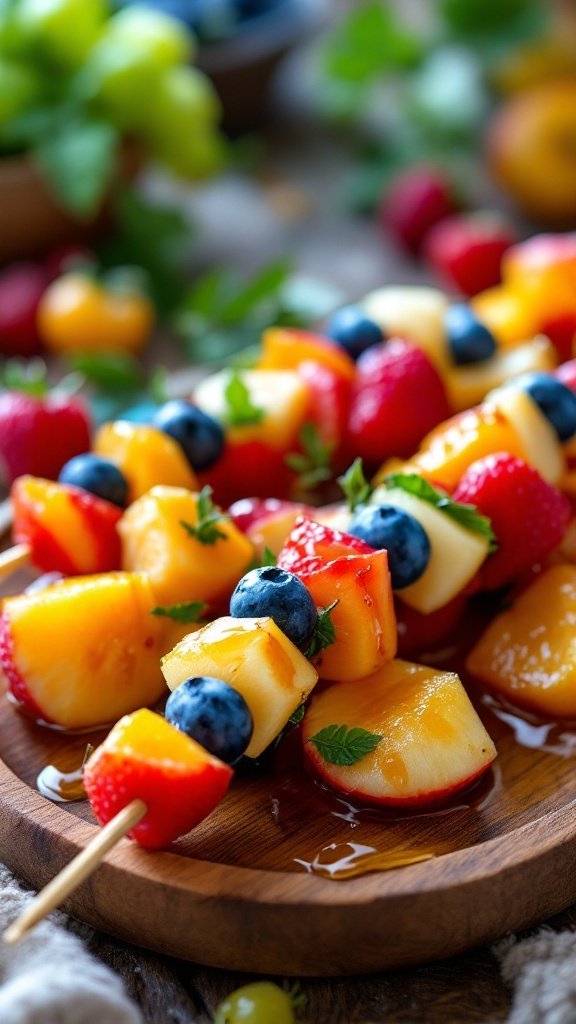
Fruit kabobs are a fun and colorful snack that kids love! They combine a variety of fresh fruits on skewers, making them both visually appealing and delicious. The sweetness of the honey drizzle adds a touch of extra flavor, making these kabobs a delightful treat for any lunchbox.
Not only are these kabobs quick and easy to prepare, but they also offer a great opportunity to get creative with different fruit combinations. Plus, they’re a healthy option that kids won’t want to trade away!
Ingredients
- 1 cup strawberries, hulled and halved
- 1 cup pineapple, cut into bite-sized pieces
- 1 cup blueberries
- 1 cup peaches, diced
- 2 tablespoons honey
- 1 tablespoon lemon juice
- Wooden skewers
Instructions
- Prepare the Skewers: Thread the strawberries, pineapple, blueberries, and peaches onto the wooden skewers, alternating the fruits for a colorful appearance.
- Make the Honey Drizzle: In a small bowl, mix the honey and lemon juice until well combined.
- Drizzle and Serve: Arrange the fruit kabobs on a serving platter and drizzle the honey mixture over the top before packing them into lunchboxes.
Printable Recipe Card
Want just the essential recipe details without scrolling through the article? Get our printable recipe card with just the ingredients and instructions.