
Craving your favorite junk foods but worried about the impact on your health? You’re in luck! We’ve got 10 easy and delicious swaps that let you enjoy those guilty pleasures without the guilt. From crispy chips to indulgent desserts, these alternatives are simple to make and won’t compromise on flavor. Dive in and discover how a few smart changes can keep those cravings satisfied while being kinder to your body!
Almond Flour Pancakes
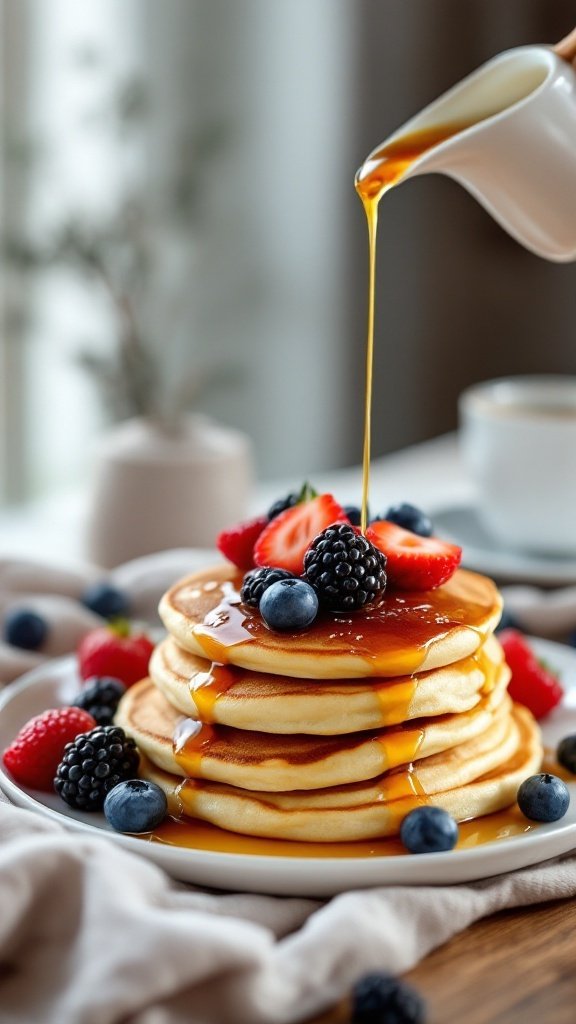
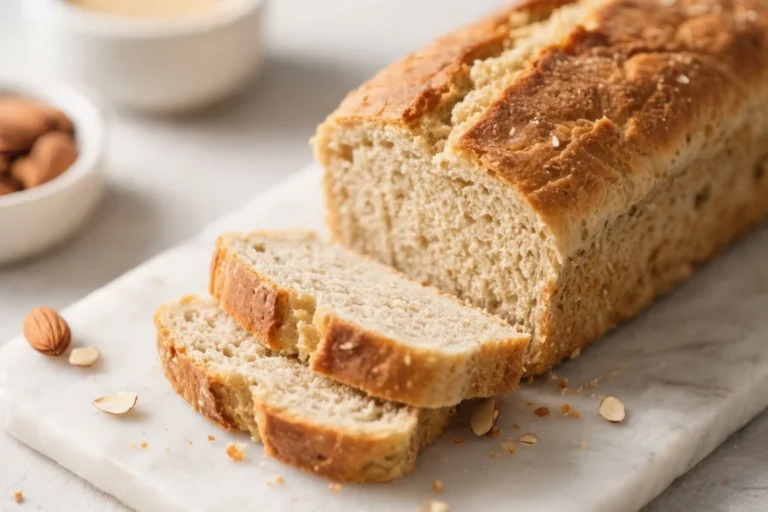
If you’re looking for a tasty breakfast that feels indulgent without the guilt, almond flour pancakes are a delightful option. These pancakes are fluffy and slightly nutty, giving you that comforting pancake experience while keeping it healthy. Plus, they’re super simple to whip up, making them perfect for a quick weekend brunch or a busy weekday breakfast.
Almond flour is a fantastic gluten-free alternative that adds a subtle sweetness and a nice texture. You can enjoy these pancakes topped with your favorite fruits, a drizzle of maple syrup, or even a dollop of yogurt for added creaminess. They’re not just delicious—they’re a smart way to start your day!
Greek Yogurt Parfait
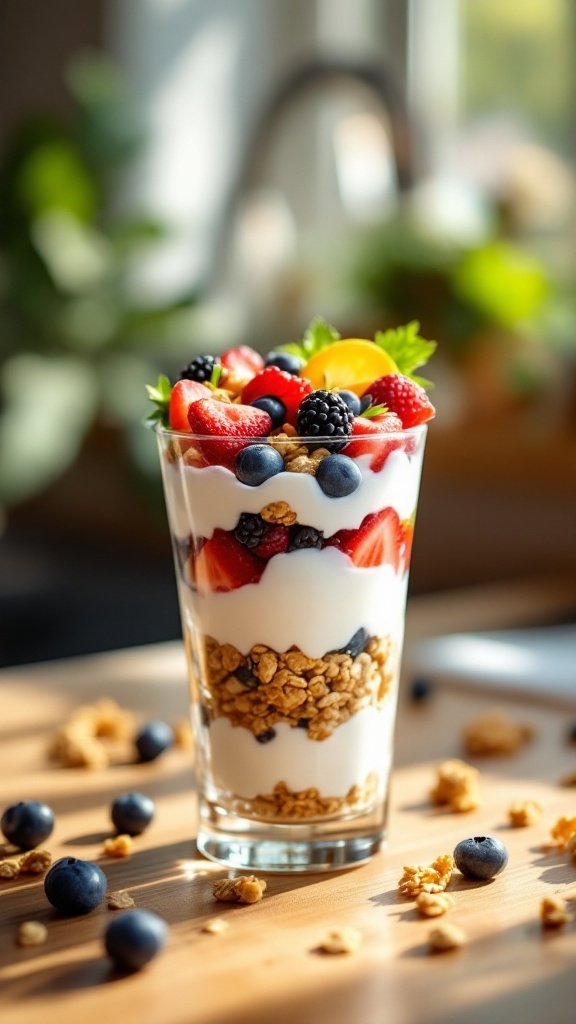
A Greek yogurt parfait is a delightful and healthy treat that layers creamy yogurt, crunchy granola, and fresh fruits. It’s not only visually appealing but also packed with protein and vitamins. This recipe is simple to whip up, making it a perfect choice for breakfast, snacks, or even dessert.
The balance of textures and flavors in this parfait is what makes it so enjoyable. The coolness of the yogurt complements the crispness of granola, while the fruits add a burst of sweetness. Plus, it’s easily customizable, allowing you to mix and match your favorite ingredients!
Ingredients
- 2 cups Greek yogurt
- 1 cup granola
- 1 cup mixed berries (strawberries, blueberries, blackberries)
- 1 tablespoon honey (optional)
- Mint leaves for garnish (optional)
Instructions
- Start by layering half of the Greek yogurt in a glass or bowl.
- Add a layer of granola on top of the yogurt, followed by a layer of mixed berries.
- Repeat the layers with the remaining yogurt, granola, and fruits.
- Drizzle honey on top if desired, and garnish with mint leaves.
- Serve immediately and enjoy your delicious Greek yogurt parfait!
Avocado Chocolate Mousse
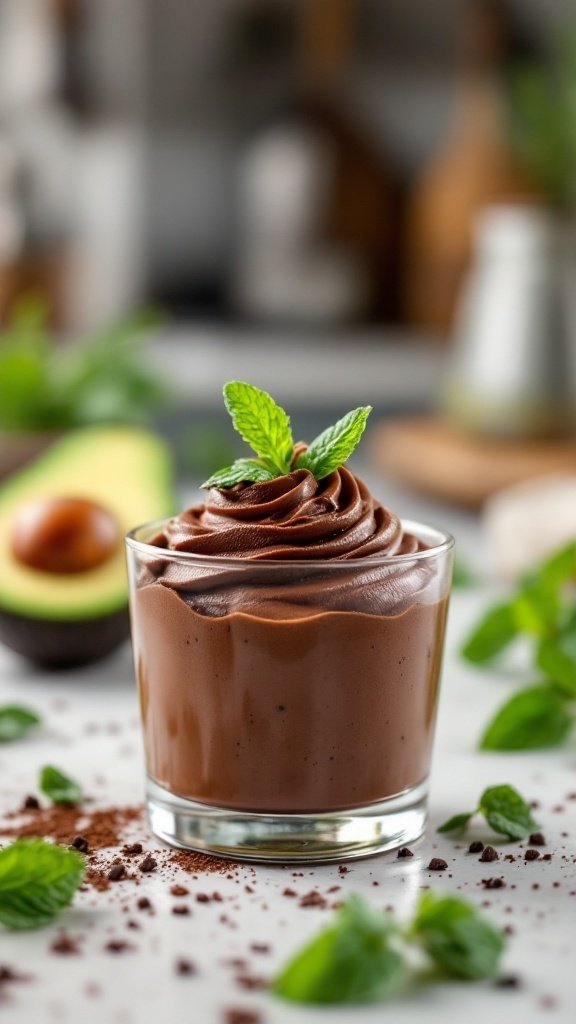
Avocado chocolate mousse is a delightful twist on traditional dessert that combines rich chocolate flavor with the creamy texture of ripe avocados. This guilt-free treat is not only simple to whip up but also delivers a velvety consistency that will satisfy your sweet tooth without the added sugar and cream of classic mousses.
The blend of ripe avocado with cocoa powder creates a smooth, indulgent dessert that feels decadent yet is packed with nutrients. It’s a fun and healthy way to enjoy chocolate, making it a perfect option for those looking for a lighter dessert that doesn’t compromise on flavor.
Ingredients
- 2 ripe avocados
- 1/3 cup unsweetened cocoa powder
- 1/4 cup pure maple syrup or honey
- 1 teaspoon vanilla extract
- Pinch of salt
- 1/4 cup almond milk (or any milk of choice)
Instructions
- Prepare the Avocados: Cut avocados in half, remove the pit, and scoop the flesh into a blender or food processor.
- Add Ingredients: To the avocados, add cocoa powder, maple syrup (or honey), vanilla extract, salt, and almond milk.
- Blend Smooth: Blend all ingredients until creamy and well combined, scraping down the sides as needed to ensure everything is mixed.
- Taste and Adjust: Taste the mousse and adjust sweetness if necessary by adding more maple syrup or honey.
- Chill: Transfer the mousse to serving cups and refrigerate for at least 30 minutes to firm up before serving.
Cauliflower Buffalo Wings
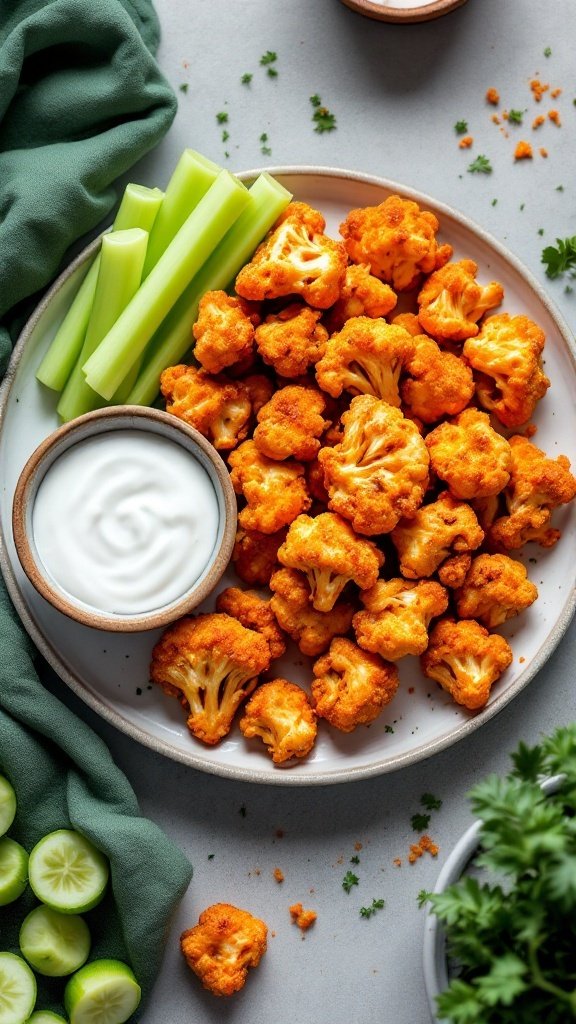
Cauliflower Buffalo Wings are a tasty and satisfying alternative to traditional buffalo wings. They bring that classic spicy flavor without the guilt, making them perfect for game day or a casual snack. The crispy exterior pairs well with the tangy sauce, giving you a delightful crunch with every bite.
This recipe is simple to prepare, requiring just a few ingredients and minimal time in the kitchen. Whether you’re enjoying them as a party appetizer or a healthy snack, these wings are sure to please everyone!
Ingredients
- 1 medium head of cauliflower, cut into bite-sized florets
- 1 cup all-purpose flour (or almond flour for a gluten-free option)
- 1 cup water
- 1 teaspoon garlic powder
- 1 teaspoon paprika
- 1/2 teaspoon salt
- 1/2 teaspoon black pepper
- 1 cup buffalo sauce
- 1 tablespoon olive oil
- Celery sticks and ranch dressing for serving
Instructions
- Preheat your oven to 450°F (232°C) and line a baking sheet with parchment paper.
- In a bowl, whisk together flour, garlic powder, paprika, salt, and pepper. Gradually add water until you have a smooth batter.
- Dip each cauliflower floret into the batter, letting the excess drip off, and place them on the baking sheet in a single layer.
- Bake for 20 minutes until golden brown, flipping halfway through for even crispiness.
- In a separate bowl, combine buffalo sauce and olive oil. Once the cauliflower is baked, toss them in the buffalo sauce to coat evenly.
- Return to the oven for an additional 10 minutes to caramelize the sauce.
- Serve hot with celery sticks and ranch dressing for dipping.
Baked Sweet Potato Fries
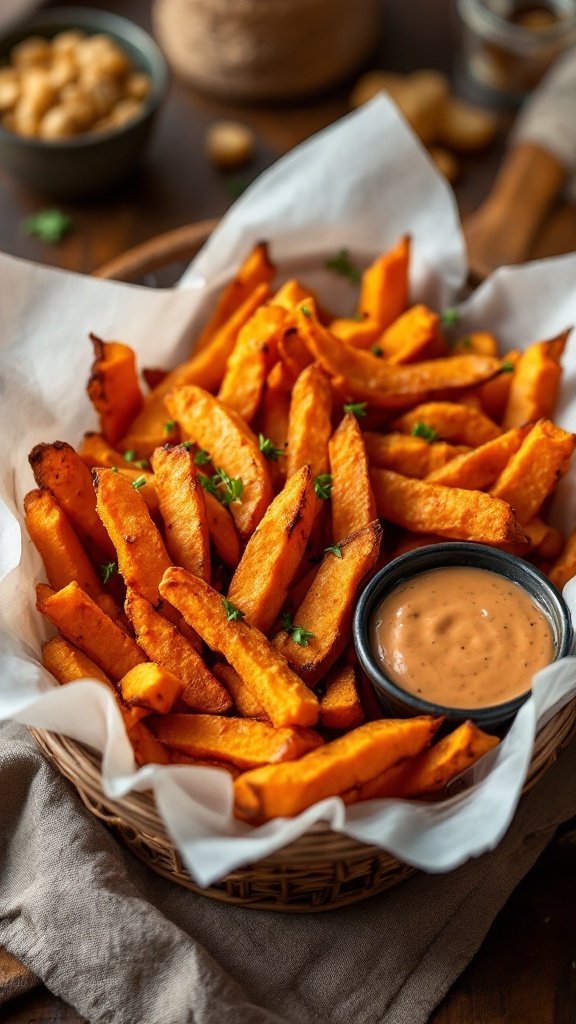
Baked sweet potato fries are a delicious and healthier alternative to traditional fries. They offer a satisfying crunch and a sweet, earthy flavor that pairs perfectly with a variety of dips. Plus, they’re super easy to whip up at home, making them a great snack or side dish.
This recipe uses simple ingredients and minimal prep time, meaning you can enjoy a guilt-free treat without spending hours in the kitchen. Tossed with spices and baked to perfection, these fries are not only tasty but also packed with nutrients.
Ingredients
- 2 large sweet potatoes
- 2 tablespoons olive oil
- 1 teaspoon paprika
- 1 teaspoon garlic powder
- 1/2 teaspoon salt
- 1/4 teaspoon black pepper
- 1/4 teaspoon cayenne pepper (optional)
Instructions
- Preheat the oven to 425°F (220°C).
- Wash and peel the sweet potatoes, then cut them into evenly sized fries.
- In a large bowl, combine the sweet potato fries, olive oil, paprika, garlic powder, salt, black pepper, and cayenne pepper. Toss to coat evenly.
- Spread the fries out in a single layer on a baking sheet lined with parchment paper.
- Bake for 20-25 minutes, flipping halfway through, until they are crispy and golden brown.
- Let cool slightly before serving with your favorite dipping sauce.
Chickpea Cookie Dough Bites

Looking for a sweet treat that won’t weigh you down? Chickpea cookie dough bites are a deliciously guilt-free alternative to traditional cookie dough. These bites are rich, creamy, and packed with protein, making them a satisfying snack or dessert. You’ll love the hint of sweetness paired with chocolate chips, creating a delightful flavor that feels indulgent yet wholesome.
Making these cookie dough bites is super simple. With just a few ingredients, you can whip up a batch in no time. They’re perfect for meal prep, too, as you can store them in the fridge for a quick snack whenever you need a little pick-me-up. Get ready to enjoy a guilt-free treat!
Ingredients
- 1 can (15 oz) chickpeas, rinsed and drained
- 1/4 cup nut butter (such as almond or peanut butter)
- 1/4 cup maple syrup or honey
- 1 teaspoon vanilla extract
- 1/2 teaspoon salt
- 1/2 cup rolled oats
- 1/4 cup chocolate chips
- Optional: 1 tablespoon cocoa powder for a chocolate version
Instructions
- Blend Base: In a food processor, combine the chickpeas, nut butter, maple syrup, vanilla extract, and salt. Blend until smooth and creamy.
- Add Oats: Mix in the rolled oats and blend briefly until just combined. If using cocoa powder, add it in this step.
- Fold in Chocolate Chips: Transfer the mixture to a bowl and fold in the chocolate chips.
- Shape Bites: Use a cookie scoop or your hands to form small balls from the mixture and place them on a baking sheet lined with parchment paper.
- Chill: Refrigerate the bites for at least 30 minutes to firm up before enjoying.
Cauliflower Crust Pizza

If you’re craving pizza but want a healthier option, cauliflower crust pizza is a delicious solution. This recipe gives you the same comforting taste of pizza while sneaking in extra veggies. The crust is crispy, and you can top it with your favorite ingredients. Whether you’re a veggie lover or a meat enthusiast, this pizza can cater to all tastes.
Making cauliflower crust is simpler than you might think. With just a few ingredients, you can whip up a guilt-free meal that everyone will enjoy. Plus, it’s an excellent way to use up leftover cauliflower. Here’s how to make your own:
Ingredients
- 1 medium head of cauliflower, grated
- 1 cup shredded mozzarella cheese
- 1/4 cup grated Parmesan cheese
- 1 large egg
- 1 teaspoon dried oregano
- 1 teaspoon garlic powder
- Salt and pepper to taste
- Your favorite pizza toppings (e.g., tomatoes, bell peppers, olives, spinach)
Instructions
- Prepare the Cauliflower: Preheat your oven to 450°F (230°C). Grate the cauliflower using a box grater or a food processor until it resembles rice. Steam the grated cauliflower for about 5 minutes, then let it cool.
- Make the Dough: Once cool, drain the cauliflower and squeeze out any excess moisture. In a bowl, combine the cauliflower, mozzarella, Parmesan, egg, oregano, garlic powder, salt, and pepper. Mix until well combined.
- Shape the Crust: Line a pizza pan with parchment paper. Press the cauliflower mixture onto the pan, forming a round crust about 1/4 inch thick.
- Bake the Crust: Bake in the preheated oven for 12-15 minutes or until golden brown. Remove from the oven.
- Add Toppings: Spread your favorite sauce over the crust and add toppings as desired. Return the pizza to the oven and bake for an additional 10 minutes, or until the cheese is melted and bubbly.
- Serve: Allow the pizza to cool for a few minutes before slicing. Enjoy your healthy, homemade cauliflower crust pizza!
Zucchini Noodles with Marinara
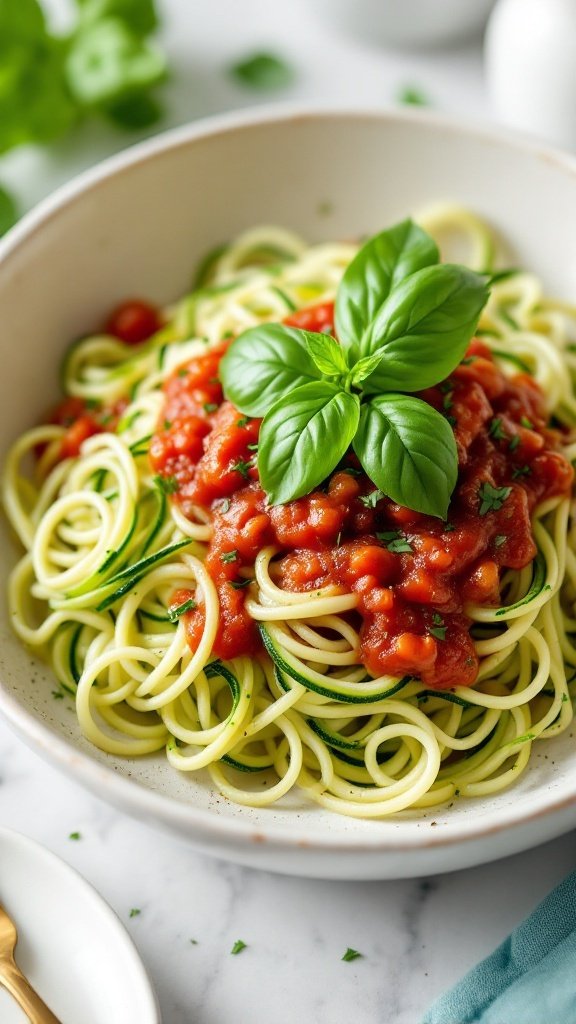
Zucchini noodles, or zoodles, are a fantastic way to enjoy your favorite pasta dishes without the carbs. They have a light and fresh flavor that pairs beautifully with rich marinara sauce, making for a satisfying meal that won’t weigh you down. This dish is not only simple to prepare but also a fun way to sneak in some extra veggies.
To make this dish even more delightful, you can customize it with your favorite herbs and spices. A sprinkle of fresh basil or a pinch of red pepper flakes can elevate the taste and make each bite refreshing. Plus, cooking zoodles takes just a few minutes, making it a quick go-to for busy weeknights!
Ingredients
- 2 medium zucchinis
- 1 tablespoon olive oil
- 2 cups marinara sauce
- 1 teaspoon garlic powder
- Salt and pepper to taste
- Fresh basil for garnish
Instructions
- Spiralize the Zucchini: Use a spiralizer to create noodle shapes from the zucchinis. If you don’t have one, you can use a vegetable peeler to make thin strips.
- Cook the Zoodles: Heat olive oil in a large skillet over medium heat. Add the zucchini noodles and sauté for about 3-4 minutes until they are slightly tender. Season with garlic powder, salt, and pepper.
- Add Marinara: Pour the marinara sauce into the skillet and stir to combine with the zoodles. Cook for another 2-3 minutes until the sauce is heated through.
- Serve: Transfer the zoodles to plates and garnish with fresh basil before serving. Enjoy your guilt-free pasta dish!
Quinoa Taco Bowls
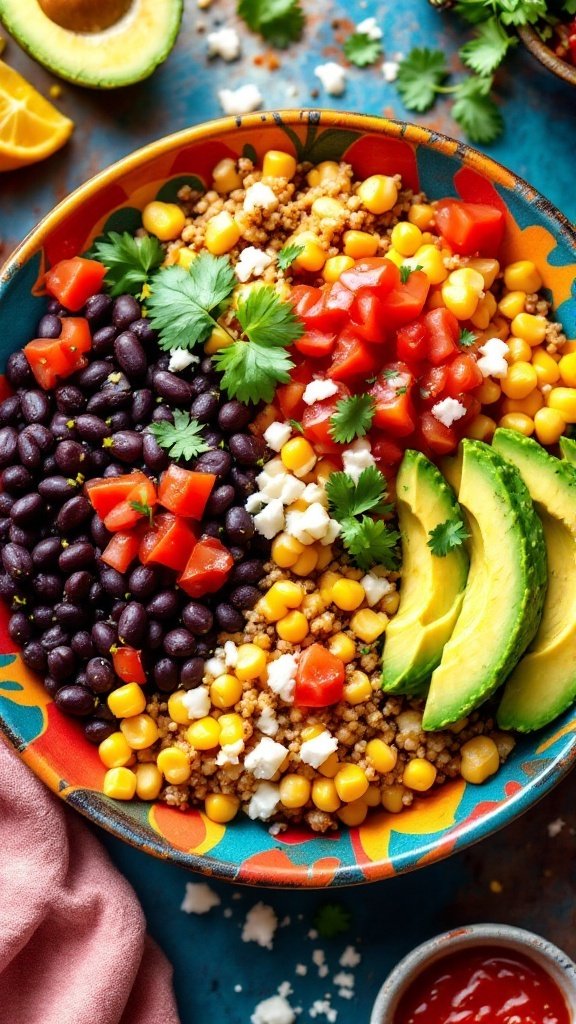
Quinoa taco bowls are a delightful way to enjoy a flavorful meal without the guilt. This dish combines the hearty texture of quinoa with classic taco flavors, making it both satisfying and nutritious. With a variety of toppings, including black beans, corn, fresh tomatoes, and creamy avocado, every bite is a burst of taste that will keep you coming back for more.
What makes this recipe so appealing is its simplicity. In just a few easy steps, you can whip up a colorful and healthy bowl that’s perfect for lunch or dinner. Plus, it’s easily customizable—feel free to swap in your favorite ingredients!
Ingredients
- 1 cup quinoa
- 2 cups vegetable broth
- 1 can black beans, rinsed and drained
- 1 cup corn, fresh or frozen
- 1 cup diced tomatoes
- 1 avocado, sliced
- 1/4 cup feta cheese (optional)
- Fresh cilantro, for garnish
- Lime wedges, for serving
- Your favorite salsa, for drizzling
Instructions
- Cook the Quinoa: Rinse the quinoa under cold water. In a medium saucepan, combine the quinoa and vegetable broth. Bring to a boil, then reduce heat to low and cover. Simmer for about 15 minutes or until all the broth is absorbed. Fluff with a fork.
- Prepare the Toppings: While the quinoa cooks, prepare your toppings. Rinse and drain the black beans, measure out the corn, and dice the tomatoes. Slice the avocado just before serving to keep it fresh.
- Assemble the Bowls: In a serving bowl, layer the cooked quinoa, followed by black beans, corn, diced tomatoes, and avocado slices. Sprinkle with feta cheese and fresh cilantro.
- Serve: Add a drizzle of your favorite salsa and serve with lime wedges on the side for an extra burst of flavor.
Fruit and Nut Energy Bars
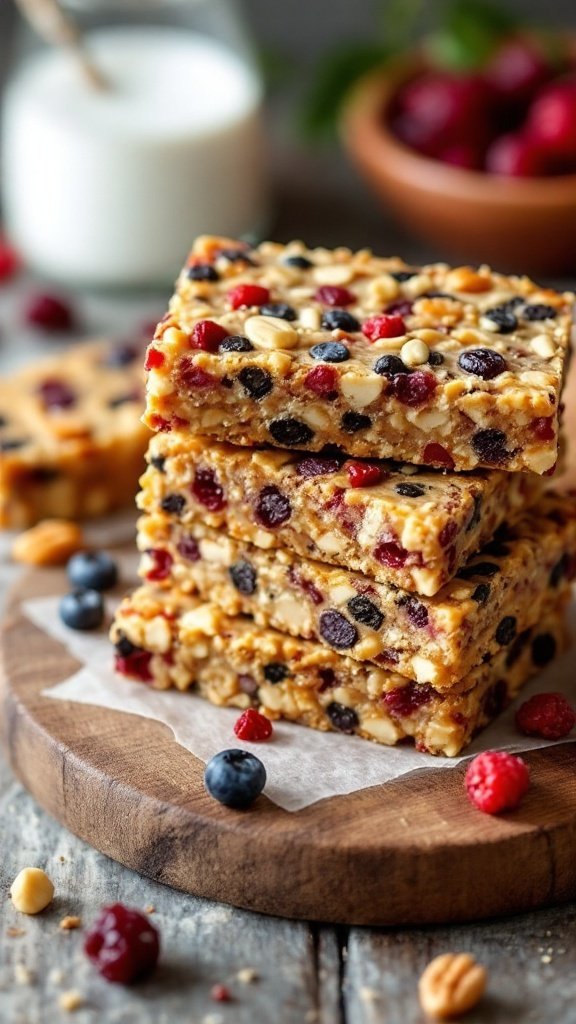
These Fruit and Nut Energy Bars are a delightful way to satisfy your sweet tooth while staying on the healthy side. Packed with wholesome ingredients, they offer a perfect blend of chewy and crunchy textures, with a burst of fruity flavors from the dried fruits and a nutty crunch from your favorite nuts. Best of all, they’re super easy to make, making them a great snack for busy days.
Whether you need a quick pick-me-up before a workout or a guilt-free treat for your afternoon cravings, these bars have got you covered. Just whip them up in a few simple steps, and you’ll have a nutritious snack ready to enjoy anytime!
Ingredients
- 1 cup pitted dates
- 1/2 cup almonds
- 1/2 cup walnuts
- 1/2 cup rolled oats
- 1/4 cup dried cranberries
- 1/4 cup raisins
- 1/4 cup honey
- 1 teaspoon vanilla extract
- 1/4 teaspoon salt
Instructions
- Prepare the Base: In a food processor, combine the pitted dates, almonds, walnuts, and oats. Pulse until the mixture is finely chopped and sticks together when pressed.
- Add Flavors: Add the dried cranberries, raisins, honey, vanilla extract, and salt to the mixture. Pulse again until well combined.
- Transfer and Shape: Line an 8×8-inch baking dish with parchment paper. Spread the mixture evenly in the dish, pressing it down firmly with your hands or the back of a spoon to ensure it holds together.
- Chill: Refrigerate the mixture for at least 2 hours to allow it to set. Once firm, remove it from the dish and cut into bars.
- Store and Enjoy: Keep the bars in an airtight container in the fridge for up to a week. Enjoy them as a quick snack or energy boost whenever you need it!
Printable Recipe Card
Want just the essential recipe details without scrolling through the article? Get our printable recipe card with just the ingredients and instructions.