
Raisin scones have a quiet kind of charm. They’re buttery, tender, and just sweet enough to feel special without tipping into dessert. If you think scones are dry or fussy, this recipe will change your mind.
These bake up light, with plump raisins in every bite and a crisp, golden top. They come together fast and make an ordinary morning feel a little more put together.
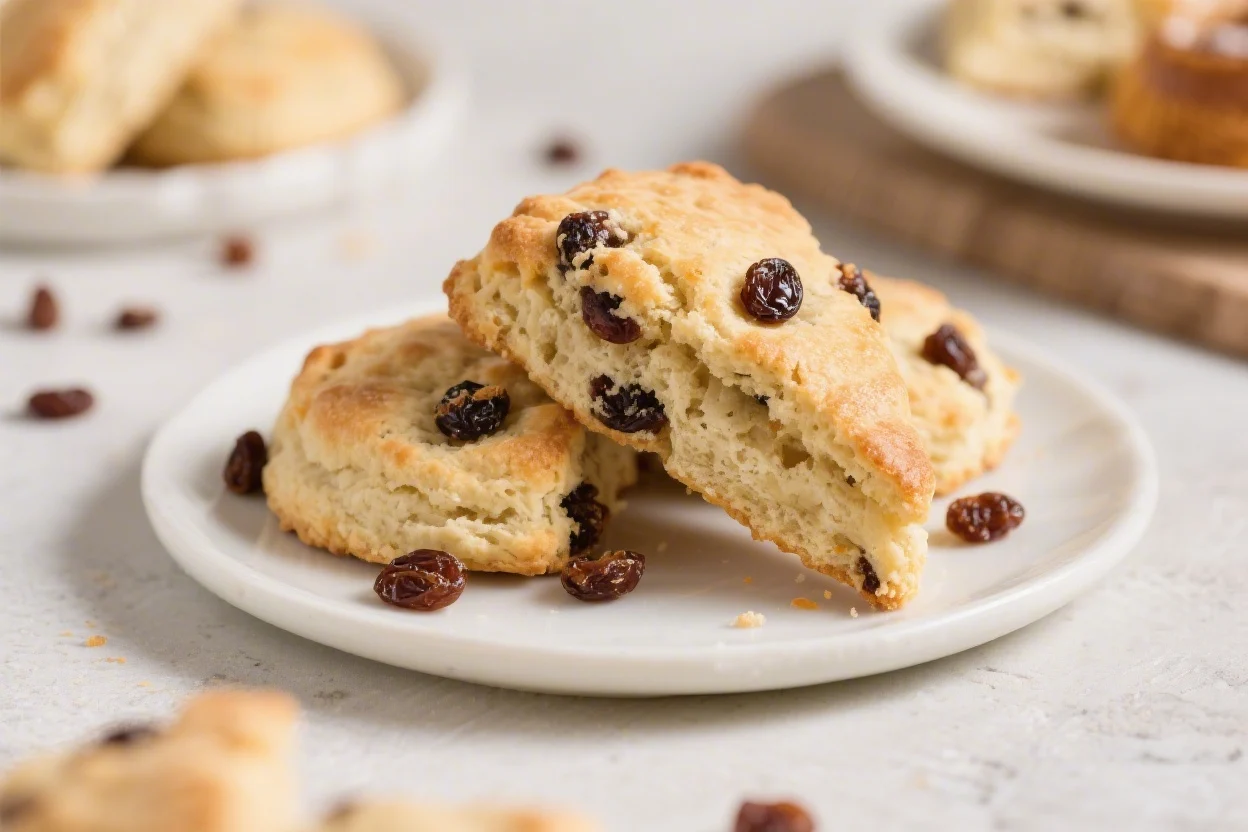
Raisin Scones the Breakfast Upgrade You Didn’t Know You Needed – Simple, Tender, and Perfect with Coffee
Ingredients
Method
- Heat the oven. Preheat to 400°F (200°C). Line a baking sheet with parchment paper.
- Mix dry ingredients. In a large bowl, whisk flour, sugar, baking powder, salt, and cinnamon until evenly combined.
- Cut in the butter. Add the cold butter cubes. Use your fingertips or a pastry cutter to work them into the flour until the mixture looks like coarse crumbs with some pea-size bits. Keep it cool; those butter pockets make flaky layers.
- Stir in raisins. Toss them into the flour-butter mixture so they’re evenly distributed and lightly coated.
- Combine wet ingredients. In a small bowl, whisk cream, milk, egg, and vanilla until smooth.
- Bring it together. Pour the wet mixture into the dry. Stir with a fork until a shaggy dough forms. It should be slightly sticky but not wet. If it’s too dry, add 1–2 teaspoons more milk.
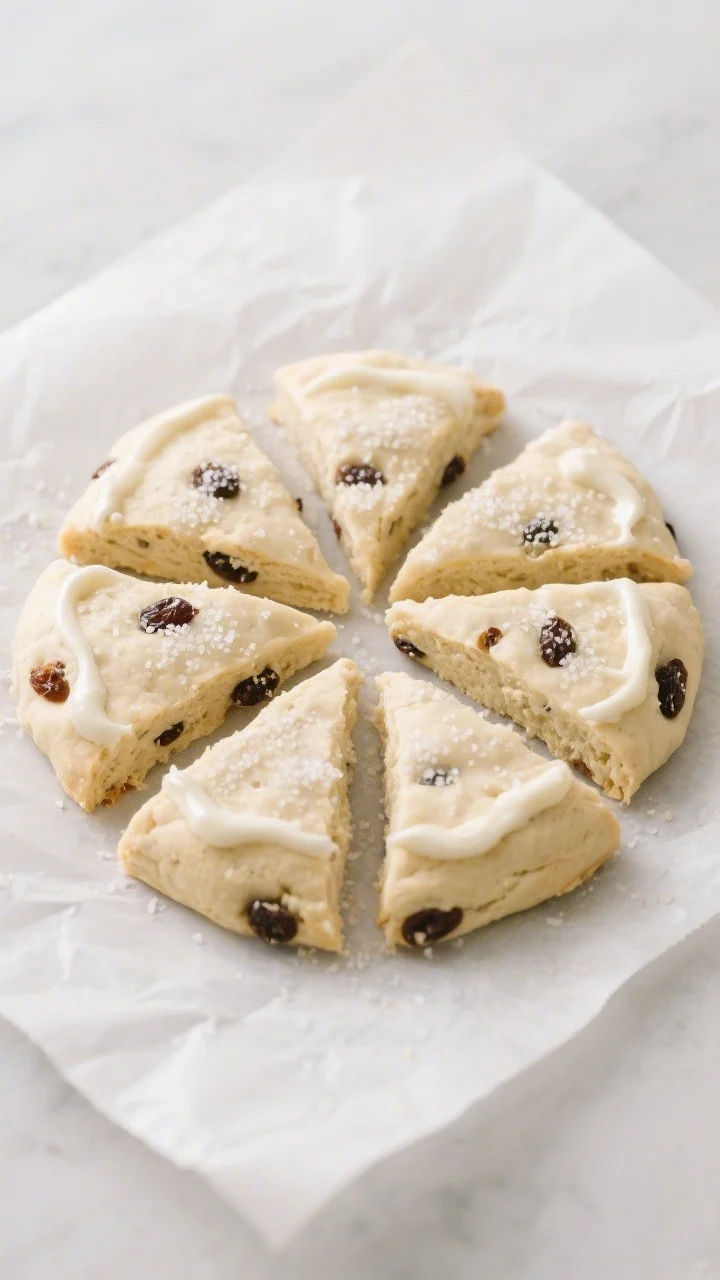
- Shape the dough. Turn the dough onto a lightly floured surface. Gently pat and fold it 2–3 times to bring it together without overworking. Press into a round about 1 inch (2.5 cm) thick.
- Slice into wedges. Cut the round into 8 even wedges. Place them on the prepared baking sheet, spaced apart.
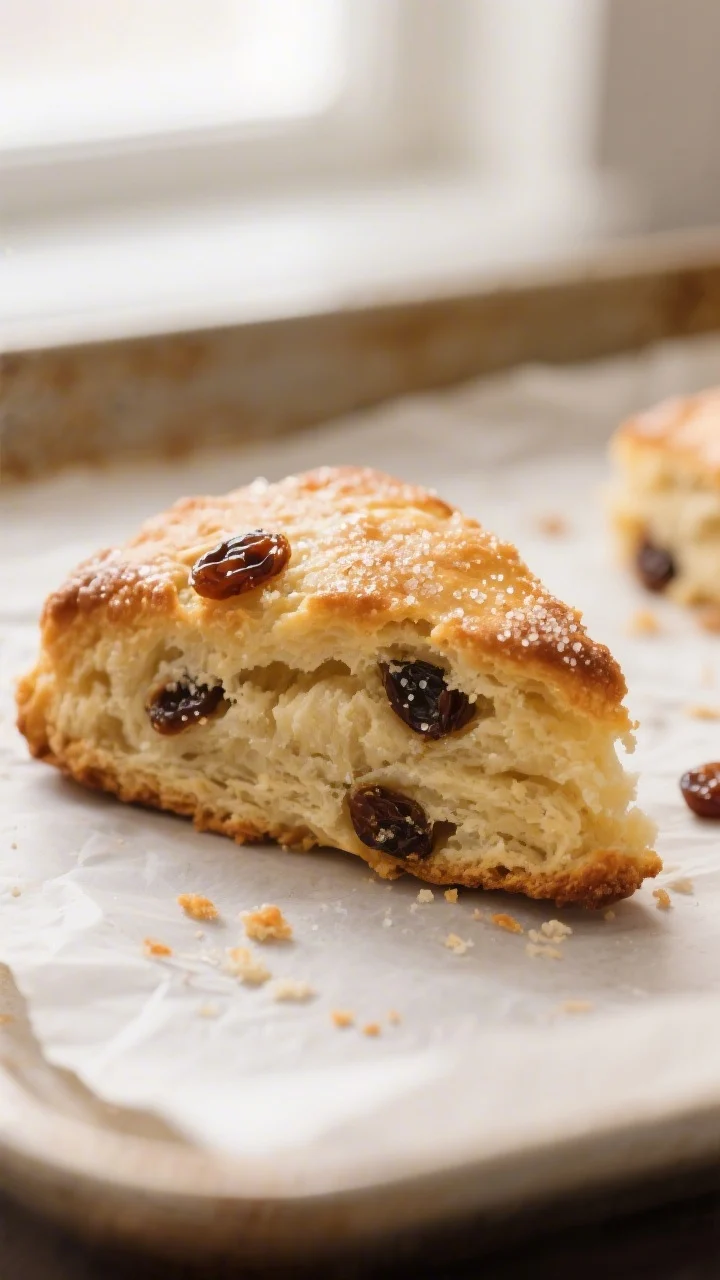
- Finish the tops. Brush lightly with cream. Sprinkle with coarse sugar for crunch.
- Bake. Bake 15–18 minutes, until the tops are golden and a toothpick comes out clean or with a few moist crumbs.
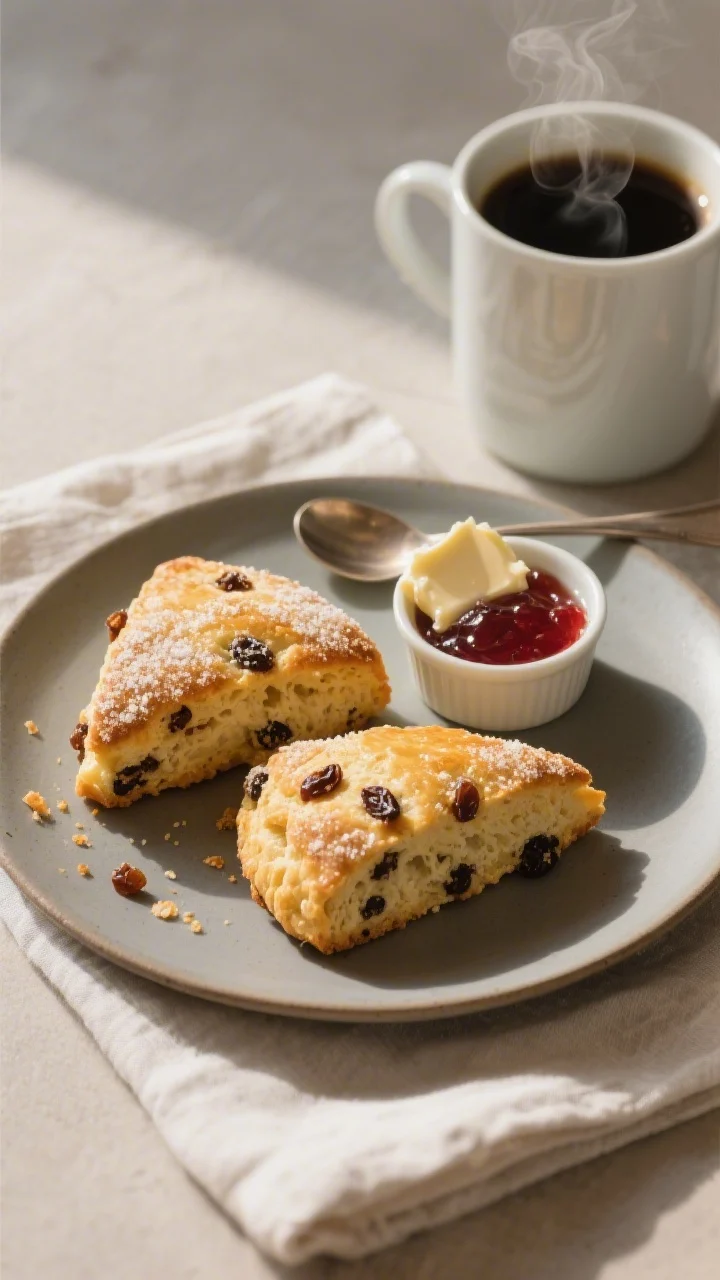
- Cool briefly and serve. Let them rest on the pan for 5 minutes, then move to a rack. Enjoy warm with butter, jam, or a swipe of honey.
☕ Scone Batch Calculator
Scale your raisin scones perfectly!
☕ Your Scone Recipe
☕ Pro Tip:
What Makes This Recipe So Good
- Tender texture, not dry. A mix of cold butter and just enough cream keeps these scones soft and moist inside.
- Balanced sweetness. The batter isn’t sugary. The raisins and a light sugar topping do the heavy lifting.
- Fast and forgiving. From mixing bowl to oven in about 15 minutes.
No special tools needed.
- Great make-ahead potential. You can chill or freeze the unbaked wedges and bake them when you want fresh scones.
- Classic flavor, simple ingredients. Pantry staples, a touch of cinnamon, and good vanilla keep things cozy and familiar.
What You’ll Need
- 2 cups (240 g) all-purpose flour
- 1/4 cup (50 g) granulated sugar
- 1 tablespoon baking powder
- 1/2 teaspoon fine salt
- 1/2 teaspoon ground cinnamon (optional but lovely)
- 1/2 cup (115 g) cold unsalted butter, cut into small cubes
- 2/3 cup (95 g) raisins (or up to 1 cup if you like them extra loaded)
- 1/2 cup (120 ml) cold heavy cream (plus a little more for brushing)
- 1/3 cup (80 ml) cold milk (whole or 2%)
- 1 large egg
- 1 teaspoon vanilla extract
- 1 tablespoon coarse sugar for topping (turbinado or demerara; optional)
How to Make It
- Heat the oven. Preheat to 400°F (200°C). Line a baking sheet with parchment paper.
- Mix dry ingredients. In a large bowl, whisk flour, sugar, baking powder, salt, and cinnamon until evenly combined.
- Cut in the butter. Add the cold butter cubes. Use your fingertips or a pastry cutter to work them into the flour until the mixture looks like coarse crumbs with some pea-size bits.
Keep it cool; those butter pockets make flaky layers.
- Stir in raisins. Toss them into the flour-butter mixture so they’re evenly distributed and lightly coated.
- Combine wet ingredients. In a small bowl, whisk cream, milk, egg, and vanilla until smooth.
- Bring it together. Pour the wet mixture into the dry. Stir with a fork until a shaggy dough forms. It should be slightly sticky but not wet.
If it’s too dry, add 1–2 teaspoons more milk.
- Shape the dough. Turn the dough onto a lightly floured surface. Gently pat and fold it 2–3 times to bring it together without overworking. Press into a round about 1 inch (2.5 cm) thick.
- Slice into wedges. Cut the round into 8 even wedges.
Place them on the prepared baking sheet, spaced apart.
- Finish the tops. Brush lightly with cream. Sprinkle with coarse sugar for crunch.
- Bake. Bake 15–18 minutes, until the tops are golden and a toothpick comes out clean or with a few moist crumbs.
- Cool briefly and serve. Let them rest on the pan for 5 minutes, then move to a rack. Enjoy warm with butter, jam, or a swipe of honey.
Keeping It Fresh
- Room temperature: Store fully cooled scones in an airtight container for up to 2 days.
Add a paper towel to absorb moisture and keep the tops from getting sticky.
- Freeze baked: Wrap individually and freeze up to 2 months. Reheat at 325°F (165°C) for 10–12 minutes.
- Freeze unbaked: Freeze cut wedges on a tray until firm, then bag them. Bake from frozen at 400°F (200°C) for 18–22 minutes.
No need to thaw.
- Refresh texture: If they soften, a quick toast in the oven brings back the crisp edges.
Why This Is Good for You
- Steady energy. The combination of flour, butter, and raisins offers carbs, some fat, and natural sugars for a more satisfying breakfast than a plain pastry.
- Raisins add benefits. They bring fiber, iron, and potassium, along with a gentle sweetness that reduces the need for extra sugar.
- Portion-friendly. Each wedge is a built-in serving, which helps with mindful eating and meal planning.
- Customizable. You can swap in whole wheat pastry flour for part of the white flour, or add nuts for more healthy fats and texture.
What Not to Do
- Don’t overmix. Tough scones happen when you work the dough too much. Stop as soon as it comes together.
- Don’t use warm butter. Warm butter blends too easily into the flour, so you lose those flaky layers.
- Don’t crowd the pan. Give the wedges space so they can rise and crisp at the edges.
- Don’t skip the chill if it’s hot. On a warm day, pop the shaped wedges in the fridge for 10 minutes before baking to help them hold their shape.
- Don’t overbake. Pull them when they’re just golden. A minute or two too long can dry them out.
Alternatives
- Flour swaps: Use 1 1/2 cups all-purpose plus 1/2 cup whole wheat pastry flour for a heartier bite.
Avoid straight bread flour—it can be tough.
- Dairy-free: Use a neutral vegan butter and full-fat coconut milk or a rich oat creamer. Flavor stays great, texture remains tender.
- Mix-ins: Try golden raisins, chopped dried apricots, or a handful of toasted walnuts or pecans. Keep total add-ins around 1 cup.
- Flavor twists: Add orange zest with raisins, or swap cinnamon for cardamom.
A lemon glaze (powdered sugar + lemon juice) is nice if you prefer a sweeter finish.
- Gluten-free: Use a 1:1 gluten-free baking blend with xanthan gum. Add 1–2 extra tablespoons of cream if the dough feels dry.
FAQ
Do I need to soak the raisins?
Soaking is optional but helpful if your raisins are very dry. Cover them in hot water or tea for 5–10 minutes, then drain and pat dry.
This keeps them plump and prevents them from pulling moisture out of the dough.
Can I use buttermilk instead of cream and milk?
Yes. Replace the cream and milk with 3/4 cup (180 ml) cold buttermilk. The scones will be slightly tangier and still very tender.
Why are my scones spreading?
Warm dough or too much liquid can cause spreading.
Make sure your butter, cream, and egg are cold. If the dough feels sticky, chill the shaped wedges for 10 minutes before baking.
How do I get taller, flakier scones?
Keep everything cold, avoid overmixing, and use a gentle fold when shaping. Press the dough to a full 1 inch thick.
A hot oven (400°F/200°C) gives them a strong lift right away.
Can I make them smaller?
Absolutely. Divide the dough into two rounds and cut each into 6 mini wedges. Bake 10–13 minutes, watching for golden edges.
What’s the best way to reheat without drying them out?
Wrap in foil and warm at 300°F (150°C) for 8–10 minutes.
For a crisper top, open the foil for the last 2 minutes.
Are they very sweet?
No. The dough is mildly sweet. Most of the sweetness comes from the raisins and the sugar sprinkled on top, so they pair well with jam without becoming cloying.
Can I use brown sugar?
Yes, you can swap in light brown sugar for half of the granulated sugar.
It adds a subtle caramel note and a touch more moisture.
Do I need a pastry cutter?
No. Your fingertips work fine. You can also grate frozen butter on the large holes of a box grater and toss it into the flour for quick, even distribution.
Final Thoughts
Raisin scones are the kind of breakfast upgrade that feels effortless but delivers big comfort.
They’re simple to make, flexible with substitutions, and taste best warm from the oven with a little butter melting into the crumb. Keep a batch in the freezer for easy mornings, or bake them fresh on a weekend and enjoy the leftovers during the week. Either way, they’ll earn a regular spot in your breakfast routine.
Printable Recipe Card
Want just the essential recipe details without scrolling through the article? Get our printable recipe card with just the ingredients and instructions.