If you love desserts that taste like they took all afternoon but secretly took 15 minutes, these bars are for you. They’re rich, chewy, and loaded with peanut butter and Oreo goodness—no oven required. You only need a handful of pantry staples and a little chill time.
Bring them to a party, stash them in the fridge for snack emergencies, or make them on a hot day when turning on the oven sounds awful. Expect a craveable mix of salty-sweet, creamy-crunchy, and pure nostalgia in every bite.
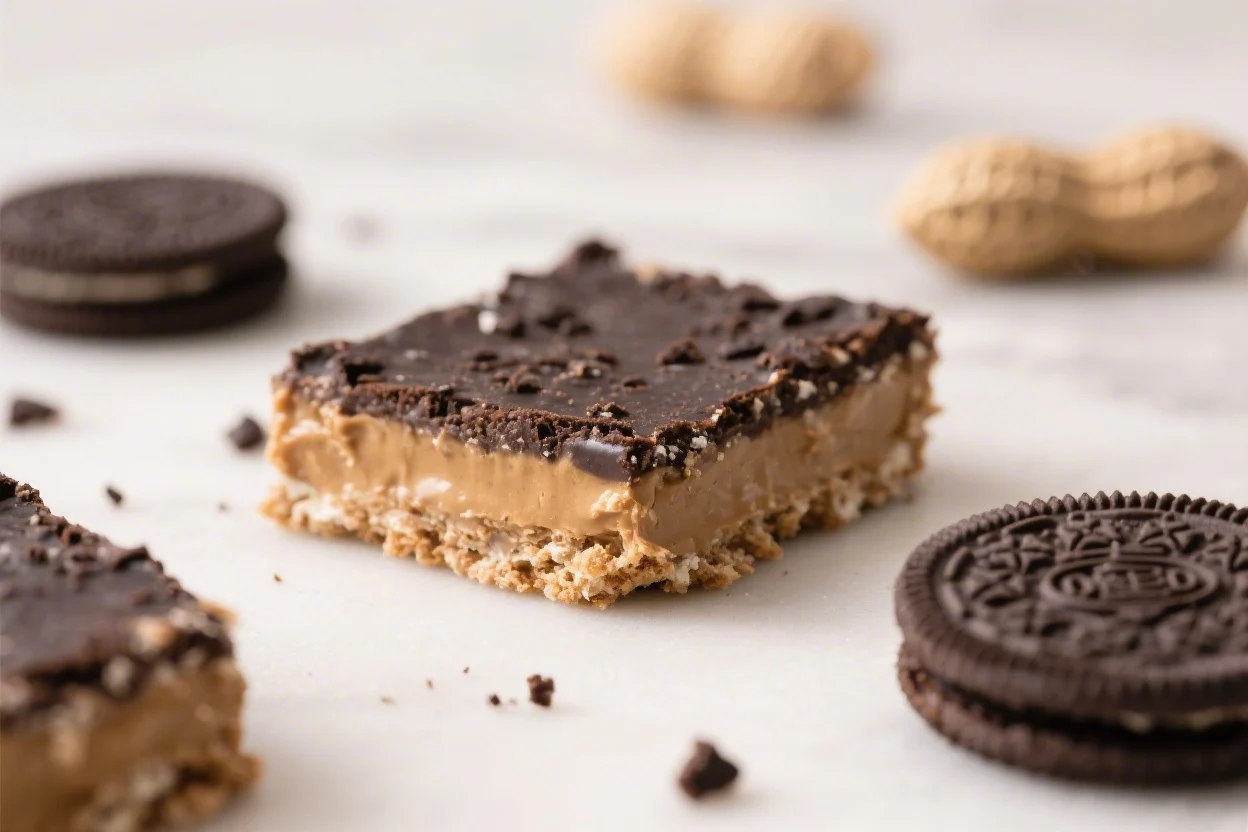
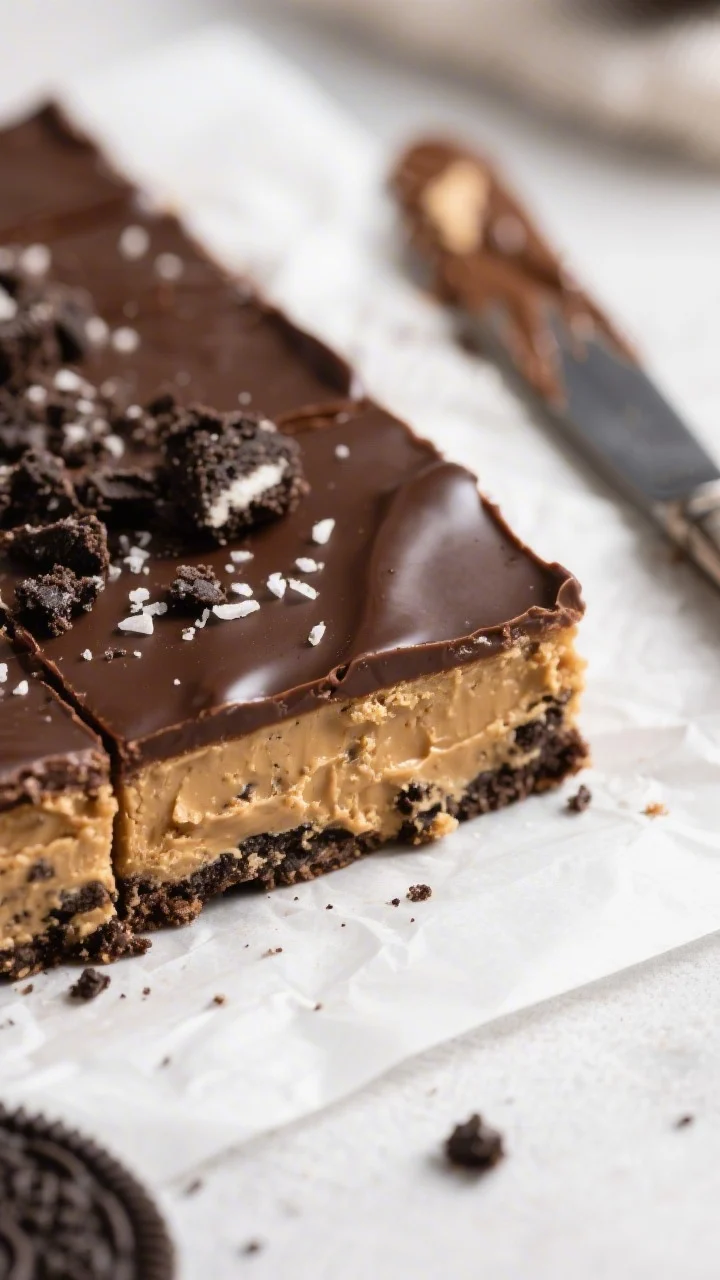
No-Bake Peanut Butter Oreo Bars the Ultimate Lazy Dessert – Sweet, Fast, and Foolproof
Ingredients
Method
- Prep the pan: Line an 8×8-inch baking pan with parchment, leaving overhangs for easy lifting. Lightly grease the parchment.
- Crush the Oreos: Add cookies to a food processor and pulse to fine crumbs with some small bits for texture. No processor? Seal cookies in a zip-top bag and crush with a rolling pin.
- Mix the base: In a large bowl, combine Oreo crumbs, melted butter, 1 cup peanut butter, powdered sugar, vanilla, and a pinch of salt. Stir until evenly combined and thick like a stiff dough.
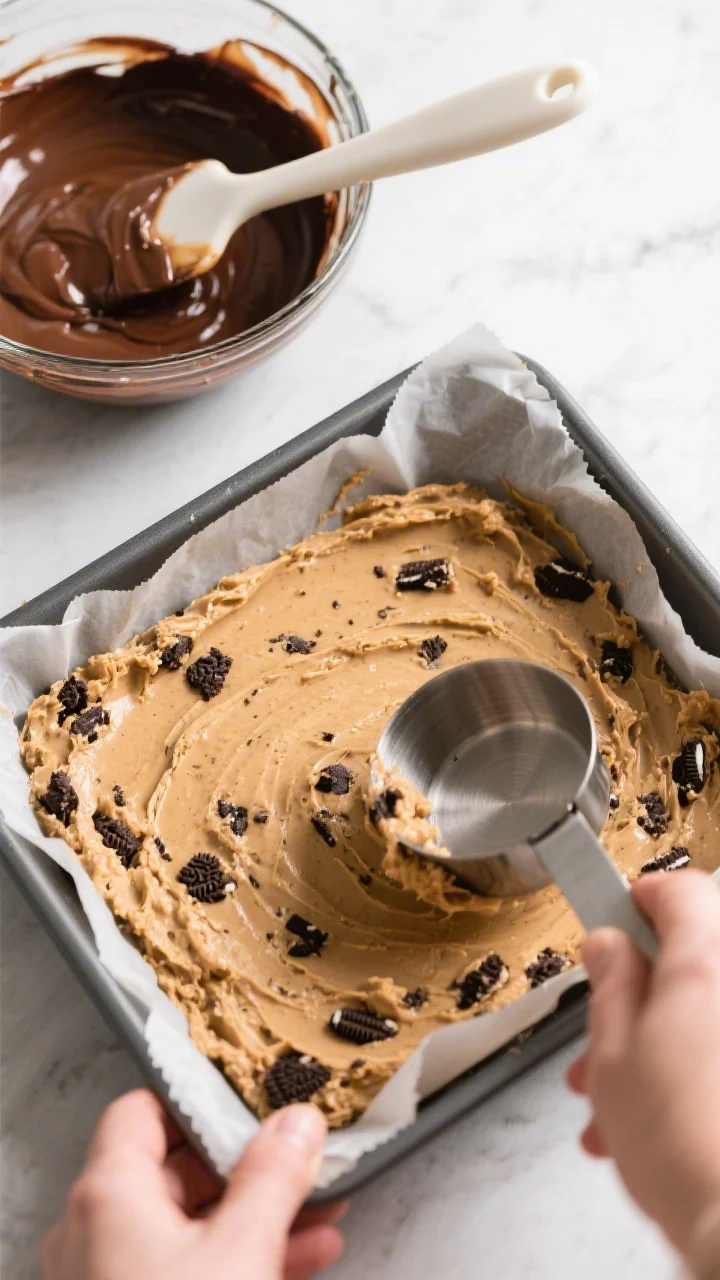
- Press into the pan: Transfer mixture to the prepared pan. Use a spatula or the bottom of a measuring cup to press it firmly and evenly into the corners.
- Melt the chocolate: In a microwave-safe bowl, heat chocolate chips with 2 tablespoons peanut butter in 20–30 second bursts, stirring after each, until smooth and glossy. Don’t overheat.
- Add the topping: Pour the warm chocolate mixture over the Oreo-peanut butter layer. Spread into an even layer. Tap the pan gently to smooth out air bubbles.
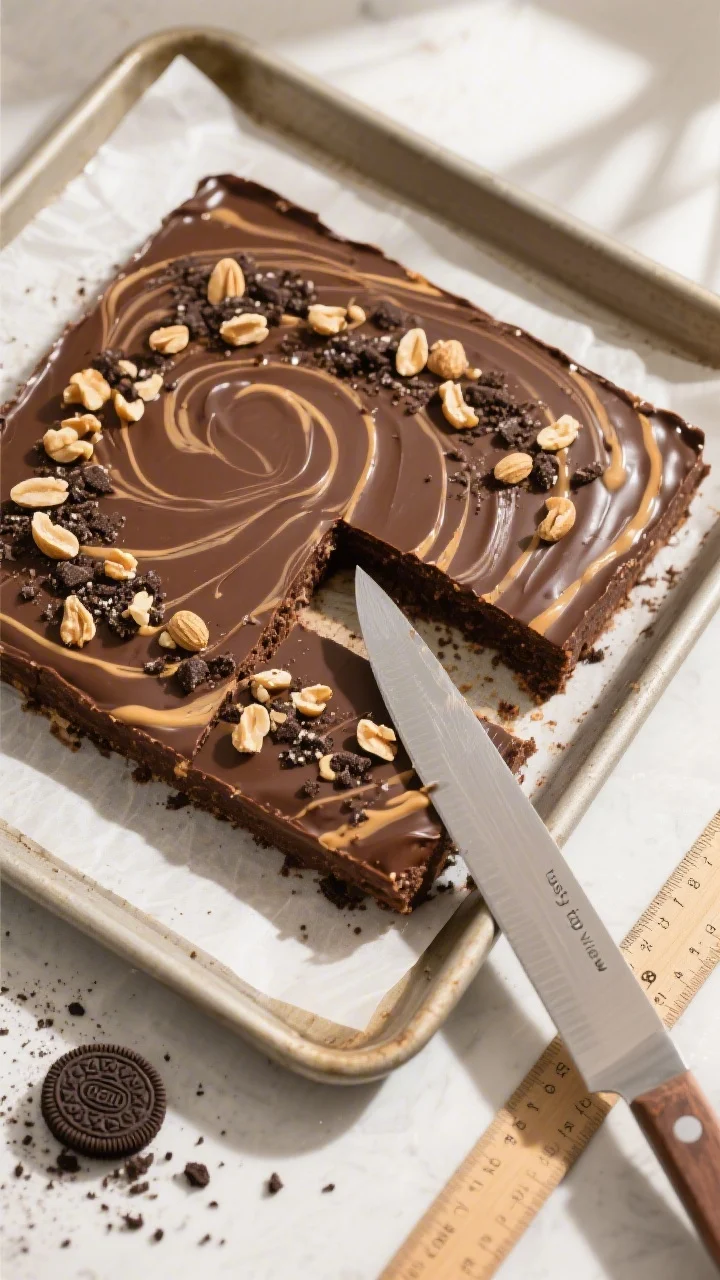
- Finish with extras: While the chocolate is still soft, sprinkle crushed Oreos, chopped peanuts, or flaky salt on top. For a swirl, drizzle warmed peanut butter in thin lines and drag a toothpick through.
- Chill to set: Refrigerate for 1–2 hours, or until the chocolate is firm and the base is set.
- Slice and serve: Lift the slab out using the parchment. Warm a sharp knife under hot water, dry it, and slice into bars. Wipe the knife between cuts for clean edges.
Why This Recipe Works
This recipe nails that perfect balance of flavors and textures: sweet Oreos, salty peanut butter, and a smooth chocolate drizzle. Peanut butter acts as both flavor and binder, so there’s no need for eggs, flour, or baking.
Crushing the Oreos gives you a base that’s sturdy yet chewy once chilled, while a little butter helps everything set up cleanly. The microwave does the heavy lifting, so it’s fast and low-effort. And because it’s no-bake, it’s hard to mess up even if you’re new to desserts.
Ingredients
- Oreos: 36 standard chocolate sandwich cookies (about 1 regular package)
- Creamy peanut butter: 1 cup (not natural, for best texture)
- Unsalted butter: 6 tablespoons, melted
- Powdered sugar: 1/2 cup (adds sweetness and structure)
- Vanilla extract: 1 teaspoon
- Salt: A pinch (skip if peanut butter is very salty)
- Chocolate chips: 1 1/4 cups (semi-sweet or milk chocolate)
- Peanut butter (for topping): 2 tablespoons (stirred into the chocolate)
- Optional toppings: Crushed Oreos, flaky sea salt, chopped peanuts, or a peanut butter swirl
How to Make It
- Prep the pan: Line an 8×8-inch baking pan with parchment, leaving overhangs for easy lifting.
Lightly grease the parchment.
- Crush the Oreos: Add cookies to a food processor and pulse to fine crumbs with some small bits for texture. No processor? Seal cookies in a zip-top bag and crush with a rolling pin.
- Mix the base: In a large bowl, combine Oreo crumbs, melted butter, 1 cup peanut butter, powdered sugar, vanilla, and a pinch of salt.
Stir until evenly combined and thick like a stiff dough.
- Press into the pan: Transfer mixture to the prepared pan. Use a spatula or the bottom of a measuring cup to press it firmly and evenly into the corners.
- Melt the chocolate: In a microwave-safe bowl, heat chocolate chips with 2 tablespoons peanut butter in 20–30 second bursts, stirring after each, until smooth and glossy. Don’t overheat.
- Add the topping: Pour the warm chocolate mixture over the Oreo-peanut butter layer.
Spread into an even layer. Tap the pan gently to smooth out air bubbles.
- Finish with extras: While the chocolate is still soft, sprinkle crushed Oreos, chopped peanuts, or flaky salt on top. For a swirl, drizzle warmed peanut butter in thin lines and drag a toothpick through.
- Chill to set: Refrigerate for 1–2 hours, or until the chocolate is firm and the base is set.
- Slice and serve: Lift the slab out using the parchment.
Warm a sharp knife under hot water, dry it, and slice into bars. Wipe the knife between cuts for clean edges.
How to Store
- Refrigerator: Store in an airtight container for up to 1 week. Layer with parchment to prevent sticking.
- Freezer: Freeze for up to 2 months.
Wrap tightly and thaw in the fridge for 30–45 minutes before serving.
- Room temperature: Short term only. If your kitchen is cool, they’ll hold for a few hours, but the chocolate may soften.
Benefits of This Recipe
- No oven needed: Great for dorms, hot weather, or last-minute treats.
- Fast and simple: Minimal dishes, minimal steps, and no special equipment.
- Crowd-pleaser: Familiar flavors kids and adults love.
- Budget-friendly: Uses basic, affordable ingredients.
- Flexible: Easy to adapt to different flavors, toppings, and pan sizes.
Common Mistakes to Avoid
- Using natural peanut butter: The oil separates and can make the bars greasy and soft. Use a standard creamy peanut butter.
- Overheating chocolate: This causes grainy or burnt chocolate.
Heat in short bursts and stir often.
- Not packing the base firmly: Loose crumbs lead to crumbly bars. Press the mixture down with some pressure.
- Skipping chill time: Cutting too soon means messy, soft slices. Let them fully set.
- Too much powdered sugar: It can dry out the base.
Measure it lightly and level the cup.
Variations You Can Try
- Crunchy twist: Stir in 1/2 cup chopped peanuts or mini pretzels to the base for extra crunch.
- Double chocolate: Use chocolate peanut butter in the base and top with dark chocolate chips.
- Mint Oreo version: Swap in mint Oreos and add a few drops of peppermint extract to the chocolate topping.
- Peanut butter cup upgrade: Fold in chopped mini peanut butter cups before pressing into the pan.
- White chocolate top: Use white chocolate chips for the topping and drizzle with melted dark chocolate.
- Gluten-free option: Use certified gluten-free chocolate sandwich cookies.
- Salted caramel finish: Drizzle caramel over the chocolate and sprinkle flaky salt.
- Bigger batch: Double the recipe and use a 9×13-inch pan; chill a bit longer.
FAQ
Can I use natural peanut butter?
You can, but the texture won’t be as stable. Natural peanut butter tends to separate and can make the bars greasy or too soft. If you must, stir it very well and consider adding an extra tablespoon of powdered sugar.
Do I need a food processor?
No.
A zip-top bag and a rolling pin, heavy pan, or even a wine bottle work well. Aim for fine crumbs with a few small bits left for texture.
How do I keep the chocolate layer from cracking?
Let the bars sit at room temperature for 5–10 minutes before slicing and use a warm, clean knife. Avoid making the chocolate layer excessively thick; about 1/4 inch is ideal.
Can I make these dairy-free?
Yes.
Use dairy-free chocolate chips and a dairy-free butter substitute. Check that your cookies are dairy-free as well.
Why are my bars crumbly?
They might need more moisture or firmer packing. Add another tablespoon of melted butter or peanut butter to the base, and make sure you press the mixture tightly into the pan.
How sweet are these?
They’re sweet but balanced by the salt in the peanut butter and the slight bitterness of chocolate.
If you want less sweetness, reduce the powdered sugar or use dark chocolate chips.
Can I make them ahead?
Absolutely. They’re perfect for making a day in advance. Store covered in the fridge and slice just before serving.
What if I only have a 9×9-inch pan?
Use it.
The bars will be slightly thinner and may set a little faster. Keep an eye on the chill time and slice accordingly.
Wrapping Up
No-Bake Peanut Butter Oreo Bars are the answer when you want something homemade without the hassle. They’re quick, rich, and nearly impossible to mess up.
Keep this recipe in your back pocket for parties, lazy Sundays, or that late-night sweet tooth. Once you make them, you’ll wonder why you ever bothered turning on the oven for dessert. Enjoy the bars cold, share generously, and don’t skip that pinch of salt—it’s the secret to making them sing.
Printable Recipe Card
Want just the essential recipe details without scrolling through the article? Get our printable recipe card with just the ingredients and instructions.