
There’s nothing quite like a dish that’s both easy to make and a guaranteed crowd-pleaser. This creamy and spicy recipe has become a staple at my gatherings, and I’m excited to share it with you. Combining the smooth richness of cream cheese with the bold kick of hot sauce, it’s a flavor combination that never disappoints.
What I love most about this recipe is its simplicity. Using canned chicken makes it quick to prepare, and it’s budget-friendly too. Whether it’s for game day, a party, or just a casual snack, this dish is incredibly versatile. Plus, it’s perfect for dipping with chips, veggies, or even spreading on toast.
In this guide, I’ll walk you through every step, from ingredient tips to creative serving ideas. My goal is to make sure you can recreate this dish with ease and confidence. Let’s dive in and make your next gathering unforgettable!
Key Takeaways
- This dish combines creamy textures with a spicy kick for a crowd-pleasing flavor.
- Using canned chicken makes the recipe quick and budget-friendly.
- It’s perfect for parties, game days, or casual get-togethers.
- Learn ingredient tips and creative serving ideas for the best results.
- Follow a detailed, step-by-step guide to ensure perfect results every time.
My Love for Buffalo Chicken Dip
From the first bite, I knew this recipe would be a game-changer for my gatherings. It’s the kind of dish that makes everyone ask for the recipe. The creamy texture, combined with a spicy kick, is simply irresistible. Over time, it’s become my go-to for every event, from game days to casual get-togethers.
One of my favorite variations includes adding blue cheese for a tangy twist. It complements the richness of the cream cheese and adds a depth of flavor that’s hard to beat. If you’re a fan of bold tastes, this is a must-try.
Using a slow cooker has been a game-changer for me. It’s perfect for busy days when I want to prepare something delicious without spending hours in the kitchen. Just toss in the ingredients, set it, and forget it. By the time your guests arrive, the dip is ready to impress.
What I love most is how this dish brings people together. It’s always the center of attention at parties, with everyone gathered around, dipping and chatting. Each bite is a perfect blend of creamy, spicy, and cheesy goodness that keeps everyone coming back for more.
When it comes to the chicken, I’ve experimented with both canned and rotisserie options. Here’s a quick comparison to help you decide:
| Type | Flavor | Convenience |
|---|---|---|
| Canned Chicken | Mild, blends well with other ingredients | Quick and easy, no prep needed |
| Rotisserie Chicken | Richer, more pronounced taste | Requires shredding, adds extra step |
For the perfect consistency, I recommend mixing the ingredients thoroughly but gently. Overmixing can make the dip too dense. Take your time to ensure every spoonful is smooth and well-balanced.
A Closer Look at the Ingredients
Every great dish starts with the right ingredients, and this one is no exception. Let’s dive into what makes this recipe so special. Each component plays a crucial role in creating the perfect balance of flavor and texture.
Starting with the protein, I prefer using canned chicken for its convenience and mild flavor. It blends seamlessly with other ingredients, ensuring a smooth consistency. If you’re looking for a richer taste, rotisserie chicken works well too, though it requires a bit more prep.
Cheese is another star of this dish. Cheddar and Monterey Jack are my go-to choices for their excellent melting properties. For a tangy twist, blue cheese adds depth and complexity. Here’s a quick comparison of popular cheese options:
| Cheese Type | Flavor Profile | Melting Quality |
|---|---|---|
| Cheddar | Sharp, rich | Excellent |
| Monterey Jack | Mild, creamy | Great |
| Blue Cheese | Tangy, bold | Good |
The spicy kick comes from a combination of buffalo sauce and hot sauce. These sauces work together to create a bold, zesty flavor that’s not overwhelming. For a smoother blend, I always make sure the cream cheese is at room temperature before mixing.
If you’re looking to experiment, there are plenty of ingredient swaps that maintain the dish’s integrity. Greek yogurt can replace some of the cream cheese for a lighter option, and ranch dressing adds a herby twist. Each ingredient contributes to the final dip’s creamy, spicy, and cheesy goodness.
Step-by-Step Process to Perfection
Crafting the perfect dip is all about mastering the process, and I’m here to guide you every step of the way. Let’s start by heating the chicken and hot sauce together in a skillet. This step ensures the flavors blend beautifully from the very beginning.
Next, mix softened cream cheese with ranch dressing. This creates a silky, rich base that’s the heart of the recipe. Make sure the cream cheese is at room temperature for a smooth consistency.
Once the base is ready, it’s time to layer in the cheeses. I recommend a combination of cheddar and Monterey Jack for their excellent melting qualities. Stir gently to incorporate everything evenly.
Now, decide between baking or using a slow cooker. For the oven, bake at 350°F for about 20 minutes until bubbly. If using a slow cooker, set it on low for 2-3 hours, stirring occasionally to maintain consistency.
Here are a few tips to ensure success:
- Stir the mixture occasionally in the slow cooker to prevent clumping.
- For a golden top, broil the oven-baked version for the last 2-3 minutes.
- Let the dip cool slightly before serving to allow the flavors to settle.
Follow these steps, and you’ll have a creamy, flavorful dip that’s perfect for any occasion. Enjoy!
Flavor Boost: Enhancing the Spicy Kick
Spice lovers, this one’s for you—let’s turn up the heat! Adding a bold twist to your dish can make it unforgettable. One of my favorite ways to elevate the flavor is by adjusting the amount of hot sauce. A little extra can go a long way in creating a bolder profile that’s sure to impress.
I’ve experimented with various ingredients to bring that extra kick. Adding a splash of wing sauce, for example, intensifies the heat while keeping the flavor balanced. It’s all about finding the right combination that works for your taste buds.
Balancing the spicy elements with the creamy base is key. Too much heat can overpower the dish, so I recommend adding hot sauce gradually and tasting as you go. This ensures every bite is flavorful without being overwhelming.
Letting the flavors meld together is another crucial step. I’ve found that allowing the dish to sit for about 15-20 minutes before serving makes a noticeable difference. This gives the ingredients time to blend, creating a richer and more cohesive taste.
Adjusting the spice level is also a great way to accommodate everyone’s preferences. For a milder version, reduce the hot sauce and add a touch of ranch dressing. For those who love it hot, double up on the wing sauce or even add a pinch of cayenne pepper.
Finally, using quality ingredients is essential. Fresh, high-quality hot sauce and wing sauce make a world of difference. They ensure the flavor boost is effective and delicious, taking your dish to the next level.
Buffalo Chicken Dip: The Crowd-Pleasing Favorite
When it comes to party snacks, this dish always steals the show. It’s the one recipe I can count on to bring everyone together. Every time I serve it, the bowl is empty within minutes. That’s the magic of this creamy, spicy creation.
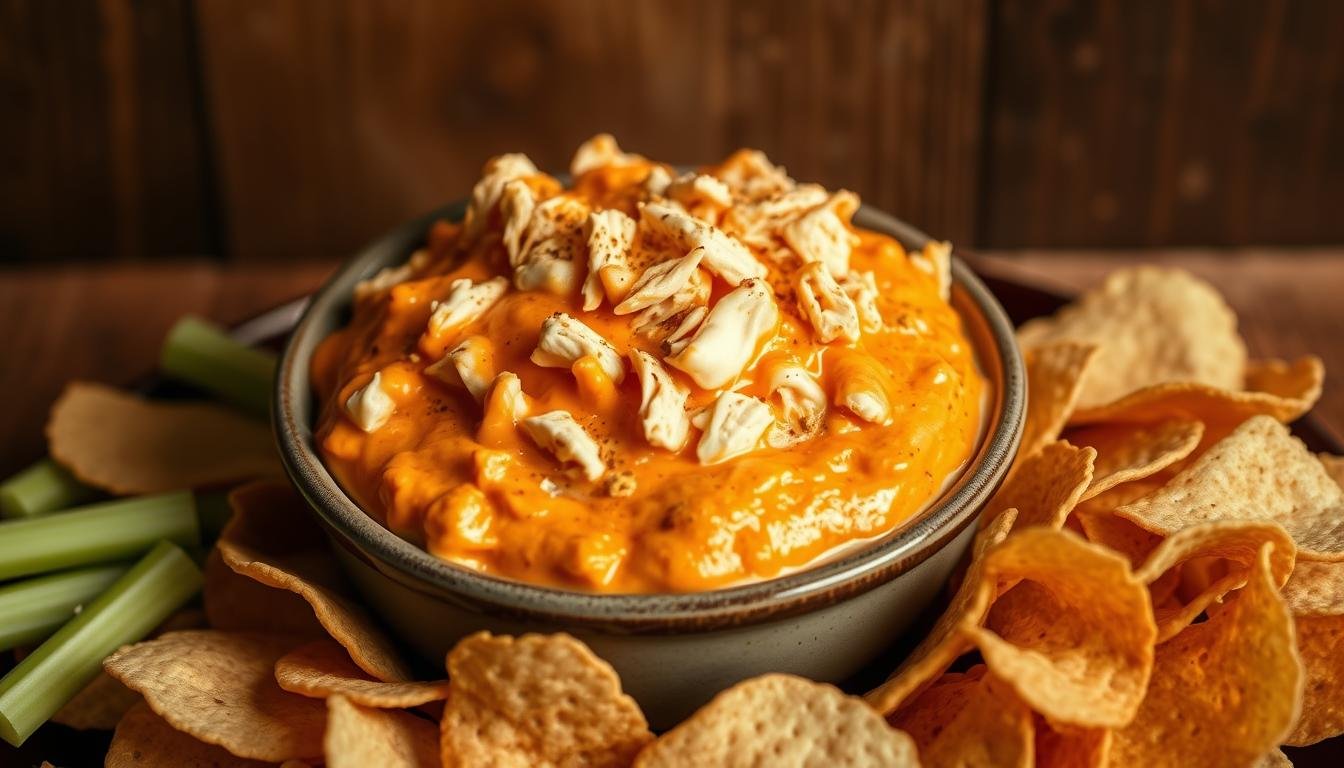
What makes it so special? It’s the perfect balance of flavors and textures. A cup of tangy sauce mixed with creamy cheese creates a base that’s irresistible. Pair it with crispy chips or fresh celery sticks, and you’ve got a winning combination.
I’ve noticed that this dish appeals to everyone, from kids to adults. It’s not too spicy for the little ones, yet it has enough kick to satisfy those who love bold flavors. That’s why it’s become a staple at every party I host.
Here’s what makes it a crowd favorite:
- It’s quick to prepare—every minute spent is worth it for the smiles it brings.
- The measurements are simple: a cup of sauce, a cup of cheese, and you’re halfway there.
- Creative pairings like tortilla chips and celery sticks make it fun to eat.
- Its versatility makes it the perfect appetizer for any occasion.
Whether it’s a game day gathering or a casual get-together, this dish elevates the party atmosphere. It’s not just food—it’s an experience that brings people together. Try it at your next event, and watch it disappear in minutes!
Mastering the Slow Cooker Method
The slow cooker method has become my secret weapon for effortless entertaining. It’s perfect for keeping the dish warm throughout a party while maintaining the right fat content and creamy texture. Here’s how I set it up for the best results.
First, I combine all the ingredients in the cooker. This ensures the flavors meld together beautifully. I use a spatula or stick to stir the mixture periodically. This prevents clumping and keeps the consistency even.

Adding diced celery at the end is a game-changer. It offers a burst of freshness that balances the richness of the dish. This small touch makes a big difference in the final flavor.
To keep the dish warm without drying it out, I set the cooker to the “warm” setting once it’s done cooking. This ensures it stays at the perfect temperature for serving. Here’s a quick guide to slow cooker settings:
| Setting | Time | Best Use |
|---|---|---|
| Low | 2-3 hours | Slow cooking for even flavor |
| High | 1-2 hours | Quick preparation |
| Warm | Up to 4 hours | Keeping the dish ready to serve |
The slow cooker method is forgiving and ideal for busy days. It allows me to focus on other tasks while the dish cooks to perfection. Whether it’s a party or a casual get-together, this method never fails to impress.
Oven and Stove Techniques for a Perfect Finish
For those who love a hands-on approach, mastering oven and stove techniques can elevate your dish to the next level. These methods offer a crispy, golden finish that’s hard to resist. Let’s dive into how you can achieve that perfect bubbly result.
Start by preheating your oven to 350°F. This ensures even cooking and a crisp top layer. Spread your mixture evenly in a baking dish and bake for about an hour. Keep an eye on it during the last 10 minutes to avoid over-browning.
If you prefer the stove, reheating and stirring is key. Use medium heat and stir frequently to distribute the heat evenly. This method is great for maintaining a creamy texture while adding a touch of warmth.
Buffalo wing sauce plays a crucial role in enhancing the flavor. Adjust the amount to control the heat level. For a milder version, reduce the sauce. For a bolder kick, add a bit more or mix in a pinch of cayenne pepper.
Here are my top tips for switching between methods:
- Always preheat the oven for consistent results.
- Stir frequently on the stove to prevent clumping.
- Let the dish rest for 5-10 minutes before serving.
Pair your creation with crackers or toasted baguette slices for a delightful crunch. These dippers complement the creamy texture and add a satisfying contrast. Whether you choose the oven or stove, these techniques ensure a dish that’s both flavorful and visually appealing.
Creative Serving Ideas and Dipper Pairings
Looking for ways to take your appetizer game to the next level? Let’s explore some creative serving ideas. This dish is incredibly versatile, and with the right pairings, it can become the star of any gathering.
Start with the classics: crunchy tortilla chips and fresh veggies like celery and carrots. These options are perfect for balancing the spicy kick with a refreshing crunch. For a fun twist, try serving it with toasted baguette slices or crispy pita chips.
On a slow day, repurpose leftovers into something new. Use the dip as a filling for sliders or quesadillas. It’s a great way to transform the dish into a hearty meal. You can also layer it over baked potatoes or spread it on wraps for a quick and satisfying lunch.
Cooking at low temperatures helps retain the dish’s flavor while accommodating various serving ideas. Whether you’re hosting a party or enjoying a quiet evening, these pairings will keep things exciting.
Here’s a quick guide to some of my favorite dipper options:
| Dipper | Best For |
|---|---|
| Tortilla Chips | Crunchy texture, perfect for scooping |
| Celery Sticks | Fresh and light, balances the spice |
| Baguette Slices | Toasty and hearty, great for spreading |
| Pita Chips | Crispy and flavorful, ideal for dipping |
Don’t forget to garnish with sliced green onions for extra color and taste. It’s a small touch that makes a big difference. I encourage you to experiment with your own combinations to delight your guests and make every day a flavorful adventure.
Storing, Reheating, and Freezing: Keeping It Fresh
Keeping your dish fresh and flavorful is easier than you think. With a few simple tips, you can enjoy it days later without losing its creamy texture or bold taste. Let’s dive into the best practices for storing, reheating, and even freezing your creation.
First, always store leftovers in airtight containers. This locks in the flavor and prevents it from drying out. I recommend using glass or BPA-free plastic containers for the best results. If you’re planning to enjoy it within a day or two, the fridge is perfect.
When it’s time to reheat, you have two great options: the microwave or stovetop. For the microwave, heat it in 30-second intervals, stirring in between to ensure even warmth. On the stovetop, use low heat and stir frequently to maintain the creamy consistency.

Adding a handful of shredded cheddar before serving can refresh the flavor and add a cheesy kick. If you’re feeling creative, try reheating it in a tortilla wrap for a quick and delicious meal. It’s a simple way to enjoy the dish in a new form.
Freezing is another great option if you want to save it for later. Transfer the dish to a freezer-safe container and store it for up to three months. When you’re ready to enjoy, thaw it in the fridge overnight and gently reheat it on the stovetop. This method preserves the original textures and taste beautifully.
Here’s a quick guide to compare storage methods:
| Method | Duration | Best For |
|---|---|---|
| Fridge | 2-3 days | Short-term storage |
| Freezer | Up to 3 months | Long-term storage |
| Microwave | Quick reheating | Immediate use |
| Stovetop | Gentle reheating | Preserving texture |
With these tips, you can keep your dish fresh and flavorful, whether you’re enjoying it today or saving it for later. It’s all about preserving the creamy, cheesy goodness that makes it so irresistible!
Nutritional Insights and Ingredient Benefits
Understanding the nutritional value of your favorite dish can make it even more enjoyable. This recipe isn’t just about flavor—it’s packed with benefits that make it a smart choice for any gathering. Let’s break down the key components and their health advantages.
Using canned chicken is a convenient way to add protein to the dish. It’s a lean option that blends seamlessly with other ingredients. Each serving provides a good amount of protein, making it a satisfying choice for any occasion.
Cheese dressing adds richness and depth to the flavor. While it contributes to the calorie count, it also provides calcium and essential fats. For a healthier twist, consider using low-fat cheese dressing or Greek yogurt as a substitute.
| Nutrient | Amount |
|---|---|
| Calories | 250 |
| Protein | 15g |
| Fat | 18g |
| Carbohydrates | 5g |
Mindful substitutions can make this dish healthier without sacrificing flavor. For example, swapping out full-fat cheese dressing for a lighter version reduces the fat content. Adding fresh veggies like celery or carrots boosts the fiber and vitamin content.
When planning your next gathering, consider these nutritional insights. They’ll help you create a dish that’s not only delicious but also balanced and nutritious. Enjoy every bite knowing you’ve made a smart choice!
Simple Swaps and Flavor Variations
Exploring new flavors is one of my favorite ways to keep recipes exciting. With a few simple swaps, you can transform this dish into something entirely unique. Let’s dive into some of my favorite variations that can elevate the flavor and texture.
One of the easiest changes is using shredded rotisserie chicken instead of canned. It adds a richer taste and boosts the protein content. Plus, it’s a great way to use leftovers from another meal. For a creamier twist, try swapping cream cheese with sour cream or Greek yogurt. These alternatives add a tangy note while keeping the dish light.
If you’re a fan of bold flavors, buffalo wing sauce is a must-try addition. It brings an extra tangy kick that pairs perfectly with the creamy base. For cheese lovers, adjusting the slice thickness or using a mix of cheeses can change the richness. Blue cheese, for example, adds a sharp, tangy flavor that’s hard to resist.
These swaps make the recipe adaptable for various dietary needs. Whether you’re looking for a lighter version or a bolder flavor, there’s a variation for everyone. Here’s a quick guide to some of my favorite ingredient swaps:
| Ingredient | Swap | Result |
|---|---|---|
| Canned Chicken | Shredded Rotisserie Chicken | Richer taste, higher protein |
| Cream Cheese | Sour Cream or Greek Yogurt | Lighter, tangier texture |
| Ranch Dressing | Blue Cheese Dressing | Tangy, bold flavor |
| Hot Sauce | Buffalo Wing Sauce | Extra tangy kick |
“Cooking is all about creativity. Don’t be afraid to experiment and make the recipe your own.”
I encourage you to try these swaps and see what works best for your taste. Whether you’re hosting a party or enjoying a quiet night in, these variations will keep the dish fresh and exciting. Happy cooking!
My Final Thoughts and Party-Ready Recap
This recipe has become my go-to for every gathering, and it never fails to impress. The combination of creamy ranch dressing and tangy wing sauce creates a flavor that’s hard to resist. It’s a dish that brings people together, sparking joy at every party or get-together.
From the simple steps to the versatile ingredients, this recipe is as easy to make as it is delicious. Whether you’re using a slow cooker or baking it in the oven, the result is always a crowd-pleaser. The key lies in balancing the richness of ranch dressing with the bold kick of wing sauce.
I encourage you to try this recipe and make it your own. Add your favorite twists or stick to the classic version—it’s all about what works for you. Every bite is a reminder of why this dish has earned its place at my table.
I’d love to hear how it turns out for you! Share your experiences and let me know how you’ve customized it. This recipe is more than just food—it’s a way to create memories and bring people closer, one delicious bite at a time.
FAQ
What’s the best way to make this dip creamy?
I always use full-fat cream cheese and ranch dressing for the creamiest texture. Mixing them well before adding other ingredients ensures a smooth consistency.
Can I use canned chicken for this recipe?
Yes, canned chicken works great and saves time. Just drain it well and shred it before mixing it into the other ingredients.
How can I make this dip spicier?
I like to add extra hot sauce or a pinch of cayenne pepper. You can also use a spicier wing sauce to kick up the heat.
What’s the best way to serve this at a party?
I serve it warm with tortilla chips, celery sticks, and crackers. It’s also great with sliced baguettes or pretzels for variety.
Can I make this dip ahead of time?
Absolutely! I prepare it a day in advance and store it in the fridge. Just reheat it in the oven or slow cooker before serving.
What’s the slow cooker method for this recipe?
I combine all the ingredients in the slow cooker and cook on low for 2-3 hours, stirring occasionally. It’s perfect for keeping it warm during parties.
Can I freeze leftovers?
Yes, I freeze it in an airtight container for up to a month. Thaw it in the fridge overnight and reheat it in the oven or microwave.
Are there any healthier ingredient swaps?
I sometimes use low-fat cream cheese and Greek yogurt instead of ranch dressing. It’s lighter but still delicious.
What’s the best cheese to use for topping?
I love shredded cheddar for its meltability and flavor. You can also mix in blue cheese for a tangy twist.
How long does this dip stay fresh in the fridge?
It stays fresh for up to 3 days when stored in an airtight container. Just reheat it before serving again.